Dodge Ram Quad Cab 2002-2008: How to Repair Rear Door Wire Harness
Have you lost power on all of your Ram's rear passenger's accessories? It sounds like the wire harness may be damaged, but luckily, the repair is pretty easy. Read on for a simply DIY guide on how to fix your Ram's rear door wire harness.
This article applies to the Dodge Ram Quad Cab 1500 3rd Generation (2002-2008).
The Dodge Ram is notorious for having a fragile rear door wire harness in most of its Quad Cab models. The rear door harness uses 18-gauge wires, which, after constant bending from opening and closing the door, makes the wires more susceptible to getting ripped. In effect, the dome light, power locks, and windows would cease functioning—depending on which wire is broken. You can either take your truck to an auto shop and spend too much money replacing the wire harness, or you can splice in a new wire and restore power to the rear door yourself. The following instructions explain how to safely repair your rear door electrical wire harness while maintaining a steady budget.

Materials Needed
- Metal clothes' hanger
- Extra electrical wires
- Wire stripper
- Phillips and flat head screwdriver
- 10mm socket
- Ratchet and extension
- Electrical tape or heat shrink tubes
- Paint marker
- Soldering kit
Step 1 – Disconnect the battery
As with any electrical automotive repairs, first you must disconnect the negative battery cable (black). If there's an issue with a live wire that's cut or broken, the connected battery can result in a shock that you definitely don't want to experience.

Step 2 – Remove the rear door panel and speaker assembly
- First, remove the Phillips screw located at the top of the door panel, just to the right of the door handle.
- Remove the 10mm bolt behind the door handle.
- Pry out the door's switch panel, and disconnect its plugs.
- Lift the door panel up and out to remove it.
- Then, remove the three Phillips screws holing the speaker in place.

Step 3 – Slide out the wires
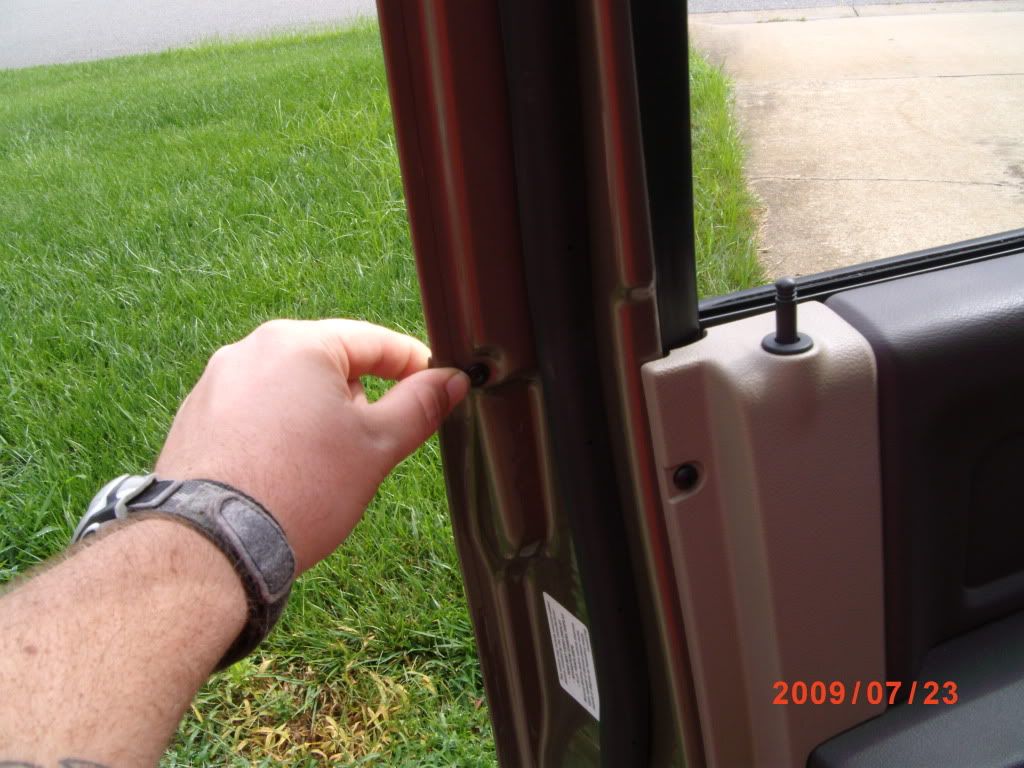
- Use a flat head screwdriver to pry out the grommets on both the door frame and the frame of the body.
- Then disconnect the wire plug from the door frame.
- Compress the wiring loom, and insert through it a straight piece of a wire hanger. Doing so will make it easier to slide the wires out.
- Take note of each wire end to make sure you do not cross any of the connections.

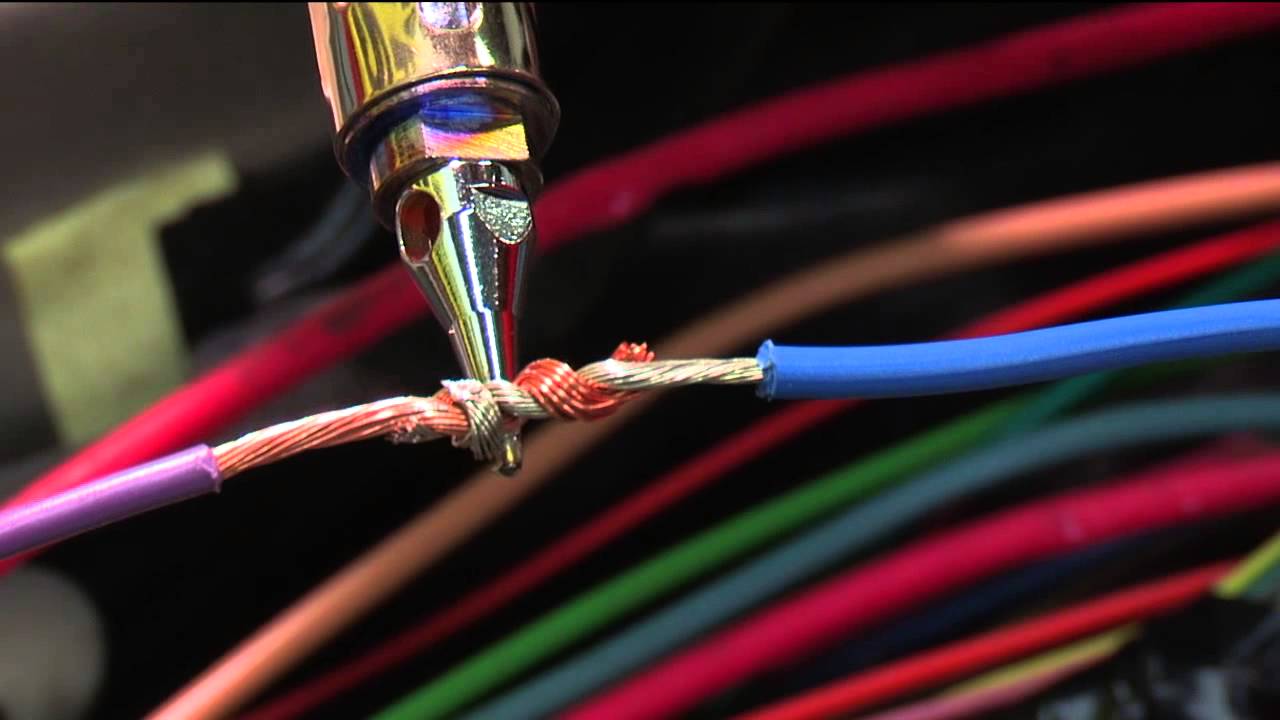
Step 4 – Repair the wire harness
You can either twist the wires in place or solder them. Twisting the wires does not create a reliable connection for the wires and poses a risk for the problem to reoccur, so it is suggested that you solder the wires.
- Cut the new wires five to ten inches in length. The number of wires depends on how many contacts you are repairing.
- Strip all wires' ends at least one inch.
- Solder each wire to their appropriate connection.
- Wrap the soldered contacts in electrical tape or heat shrink tubes.
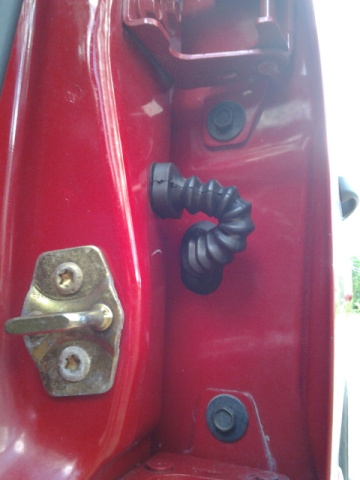
Step 5 – Access the male wire harness plug (optional)
If you managed to connect to the male wire harness plug, skip to Step 6 for further instructions.
- Remove the B-pillar cover to access the lower pillar cover.
- Pry out the flat clip under the rear door jam.
- Reach in and grab the male wire harness connector, then proceed to test the connections.
Step 6 – Re-install the grommet and door panel
- Reattach the B-pillar if you removed it.
- Plug in the wire harness connector to the plug in the door frame.
- Push the grommets into place.
- Mount the speaker assembly.
- Install the door panel along with its switch panel to finish the repair.
Related Discussion
- QC Rear Door Wire Harness Fix - Tutorial! - DodgeForum.com