Dodge Ram: How to Install a Rearview Camera
Having optimal vision around your vehicle is important. So find out how to install a rearview camera on your Dodge Ram with this helpful article.
This article applies to the Dodge Ram 2nd, 3rd, and 4th Generation (1994-Present).
Most newer vehicles are being equipped with "backup camera" systems. This feature is nothing new and has been around for many generations of vehicles. Luckily, there are several kits on the market today that allow any seasoned auto enthusiast to upgrade the safety and convenience of their vehicle. Some kits even come with infrared for night visibility. This adds another layer of safety as it enables the driver to see objects or other vehicles both day and night.

Materials Needed
- Star and flat tip screwdrivers
- Wire tires
- Heat Shrink
- Electrical tape
- Crimping tool
- Ratchet wrench with various sockets (7mm, 8mm, 9mm, etc)
- Torx bits
Step 1 – Remove latch cover
The new unit will be replacing your old latch to incorporate the camera. You will need to remove the cover and latch in parts.
- Remove the cover.
- Disconnect the power connector from the latch.
- Rotate the clip and pull it towards you to remove two rods.
- Remove the nuts holding in the latch.
- Remove the nuts holding in the key cylinder on the latch.
- Transfer this unit to the new latch cover equipped with the camera.
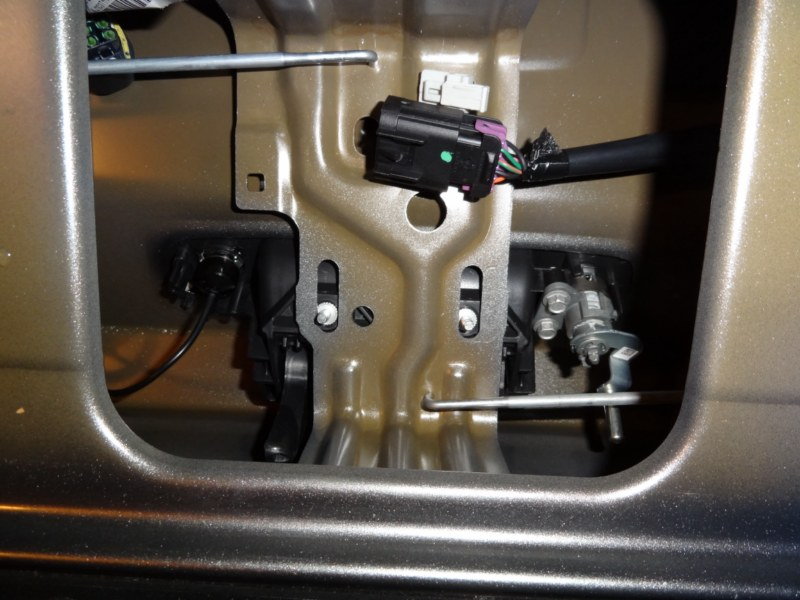
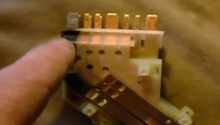
Figure 1. Latch mechanism detailed. 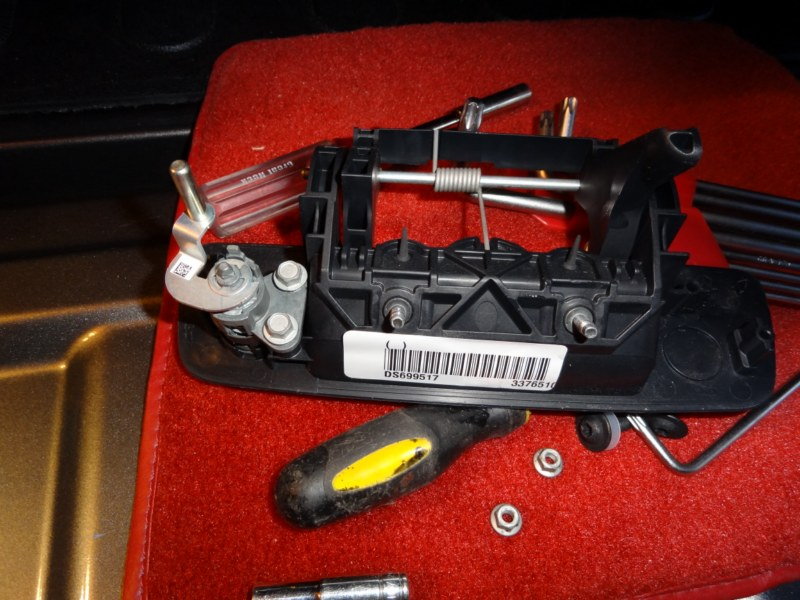
Figure 2. Latch removed. 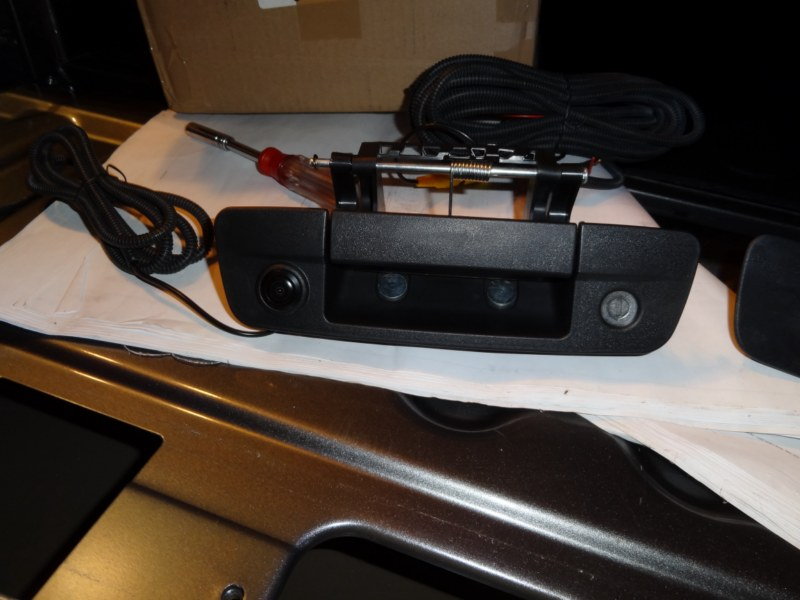
Figure 3. Old cover removed and new camera-equipped cover installed.
Pro Tip
Do not re-install the cover to the back of the tail gate until the installation is complete.
Step 2 – Attach new latch
Now that the new unit is ready to be installed as one unit, the wiring will need to be run first so you can mount the new latch into place.
- Feed the wiring to the opening, following the direction of wiring of the latch.
- Mount the latch in place and tighten the bolts removed from before.
- Guide the wiring down to the opening where the existing harness enters the cab.

Figure 4. Tail gate wiring harness. 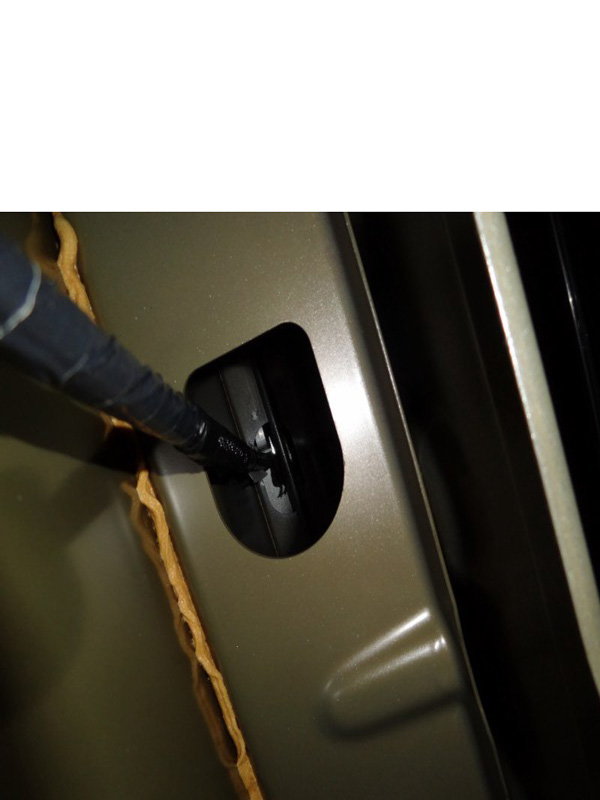
Figure 5. Camera wiring (insulated) running through tail gate. 
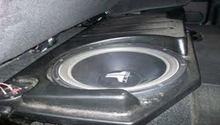
Figure 6. Camera installed.
Pro Tip
You can install heat shrink over the outer covering of the harness where it bends at the opening of the harness entry point.
Step 3 – Run wiring
Once you can get the wiring into the cabin, it will need to be run, tucked, and connected to the main harness.
- Open the hood.
- Access the grommet where the wiring enters the vehicle cabin.
- Insert the front part of the harness until it is mostly pushed through.
- Guide the wire through the wheel well where it enters the cabin.
- Run the rest of the length of the wiring through the door sills.
- Connect the rear connector to the rear tail gate.

Figure 7. Wiring harness being run to battery. 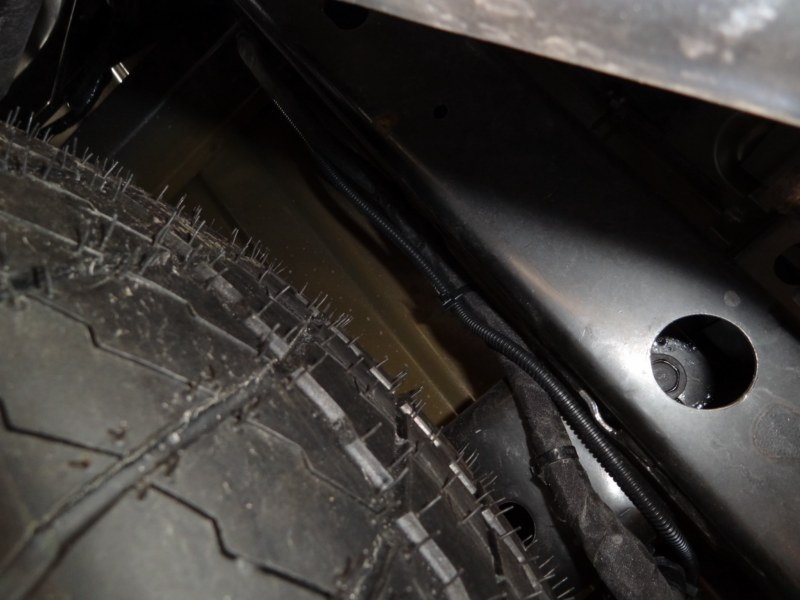
Figure 8. Wiring harness secured to chassis under truck. 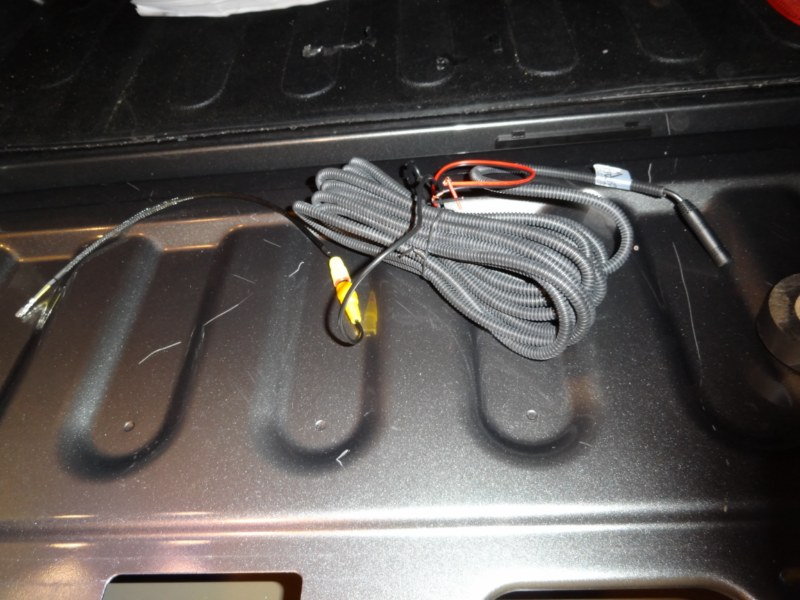
Figure 9. Split loom wiring harness protective shielding.
Pro Tip
Use silicone spray as well as heat shrink to guide the harness through the firewall and along body crevices. As you run wiring through the body, use wire ties to keep everything together.
Step 4 – Connect remaining wiring
Now that the body wiring for the system has been ran, connected, and tucked, the unit will need to be wired in for power and RCA to the back of the entertainment system.
- Remove the two Torx screws on the center dash.
- Connect the red and black power leads to the accessory outlet.
- Remove the screws on the radio, and pull it straight out.
- Connect the yellow to the RCA to complete the circuit.

Figure 10. Tapping into factory wiring harness. 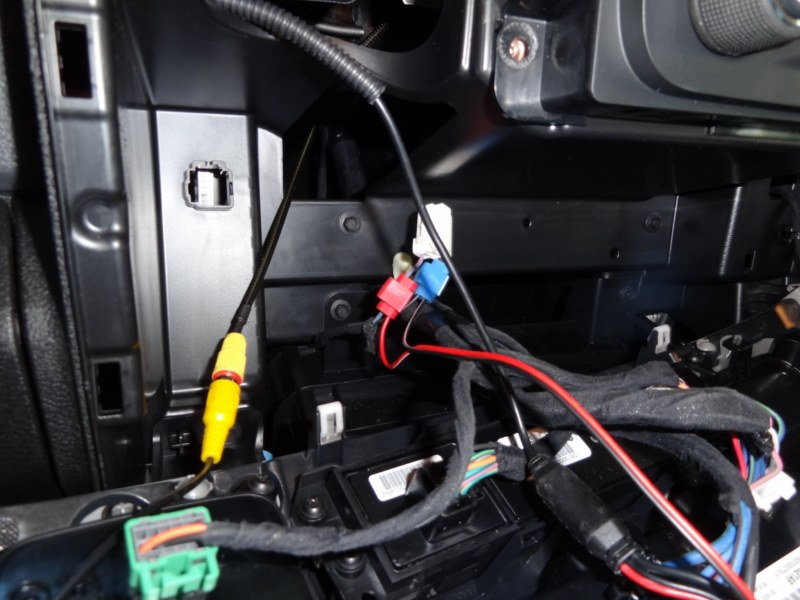
Figure 11. Integrating wiring to head unit/stereo area.
Pro Tip
Disconnect the harness for the radio and accessory via tabs on the left using a flat tip screwdriver for easier removal.
Step 5 – Re-install
Now that everything is wired and connected, the dash can be put back together and tested.
- Re-install the radio and secure the screws.
- Turn the key to accessory mode and place the gear in reverse.
- Re-install center dash trim by securing the Torx screws.
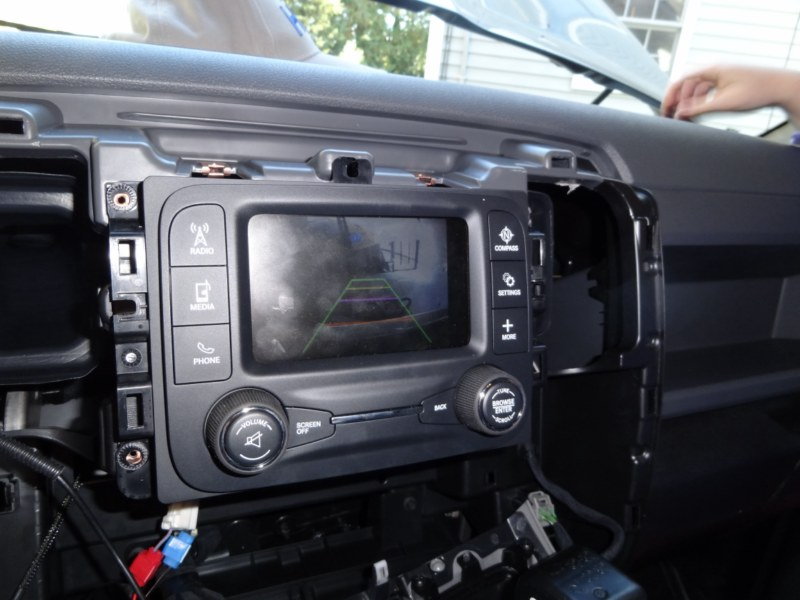
Figure 12. Testing the camera. 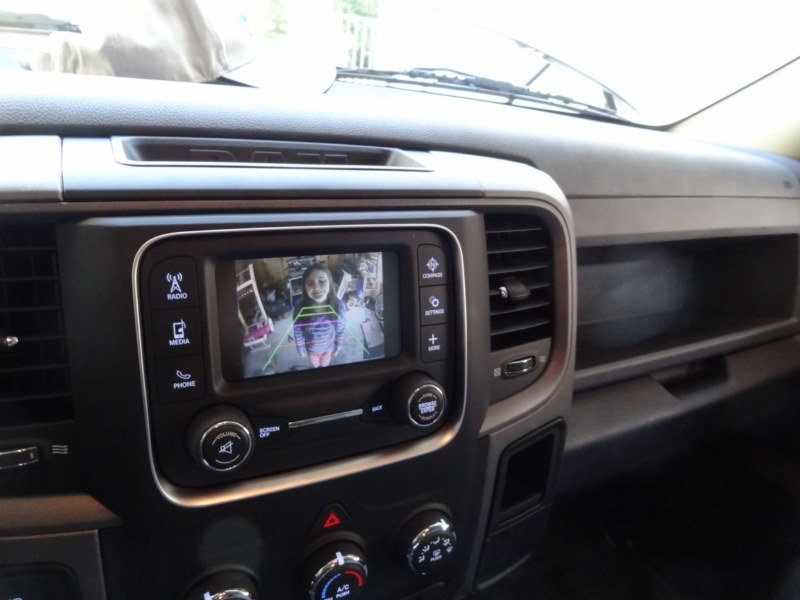
Figure 13. The finished product.
Related Discussions
- DIY: Installing Backup Camera - DodgeForum.com
- Backup Camera Install - DodgeForum.com
- Installed Backup Camera - DodgeForum.com
- Backup Camera - DodgeForum.com