Dodge Ram 1994-2008: How to Replace Stereo Head Unit
Are you tired of not being able to connect your phone or MP3 player to your truck's radio? Maybe now is a good time for an upgrade. Here is how to replace your Dodge Ram's stereo head unit.
This article applies to the Dodge Ram 1500 2nd and 3rd Generation (1994-2008).
The stock CD player in your Dodge Ram has its charms, but who really uses CDs nowadays? With the advancement of satellite radios, Bluetooth connection, and USB charging capabilities, upgrading the truck's head unit is an easy way to stay up-to-date with the automotive technologies. Even though you have the option for the radio to be professionally installed, why not save a few hundred dollars and do the job yourself. There isn't much holding the stock stereo in place, and installing a new unit is quite simple. Use the following instructions to replace the factory stereo in your Ram.

Materials Needed
- Phillips screwdriver
- Trim removal tool
- Soldering kit
- Wire stripper
- Heat shrink tubing
- Electrical tape or zip ties
Step 1 – Remove the knee bolster trim panel
- Use a trim removal tool to pry out the driver's side lower dash trim panel located on the right side of the steering column.

Step 2 – Remove the center console trim cover
- On the right side of the center console there is a screw covered by a small hook. Use a Phillips screwdriver to remove the screw.
- Use the trim removal tool to pry out the center console trim cover, starting from below the hook and working your way around. Continue until you have heard all of the clips pop out, and then remove the cover.

Figure 2. Phillips screw removed behind the center console hook. 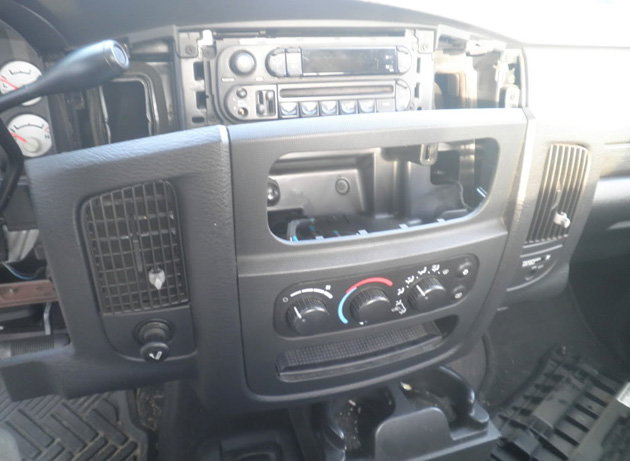
Figure 3. Pull off the center console trim cover.
Step 3 – Remove the old head unit
- Use the Phillips screwdriver to remove a screw on each corner of the stereo head unit.
- Carefully pull out the head unit, and disconnect the wire harness as well as antenna plug attached to its back side.

Figure 4. Remove the stereo head unit screws. 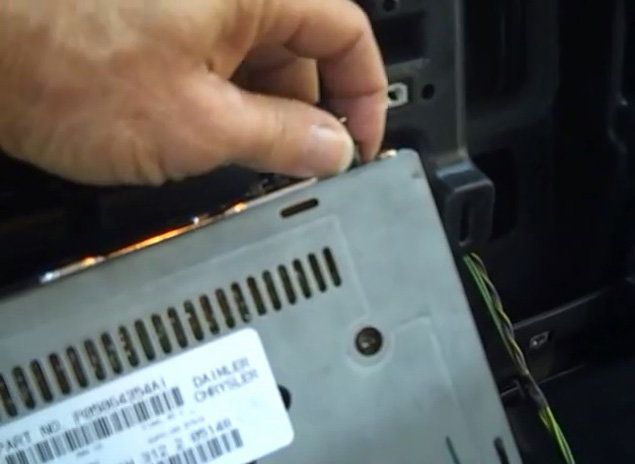
Figure 5. Disconnect the antenna wire.
Step 4 – Solder the aftermarket adapter wires
The stereo's stock wire harness adapter will not directly connect to most aftermarket head units, so you will have to use the adapter provided in your stereo's kit. Additionally, some aftermarket adapters may connect directly to the main wire harness, but other adapters will require you to solder and match certain wires.
This step will show you which wires of the aftermarket adapter to solder for it to match the main wire harness. Refer to Figures 7 and 8 for the wiring pin-out tables for a Dodge Ram.
Note
Some Dodge Ram model years may differ.
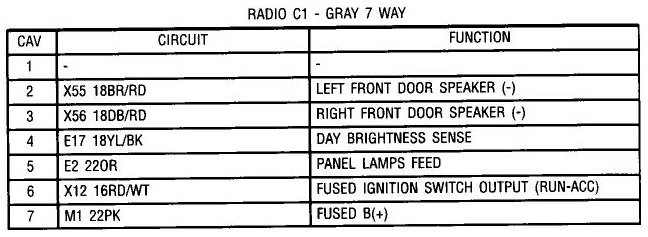
Figure 6. Radio C1 pin-out. 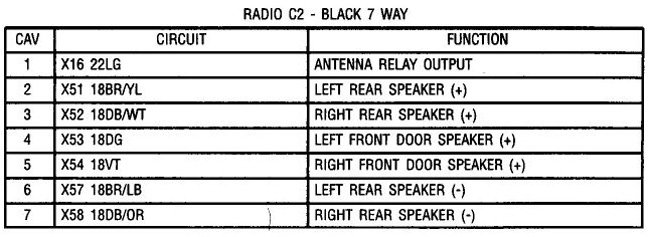
Figure 7. Radio C2 pin-out.
- Disconnect the factory stereo wire harness from the main console wire harness.
- Cut the factory stereo's wire harness and strip the ends of each wire.
- If the aftermarket adapter wires are not cut or stripped, do so for each wire as well.
- Match each colored wire of the aftermarket adapter to the factory stereo wire harness.
- Solder the wires together and wrap the connections in heat shrink tubing.
- Hold all of the wires together and use electrical tape or zip ties to secure them.
- Then connect the adapter wire harness to the aftermarket stereo unit.

- The antenna also requires a special adapter to connect the aftermarket stereo unit. Simply connect the factory antenna wire to the aftermarket antenna adapter.

Step 5 – Install the new stereo head unit
Aftermarket stereo units require the installation of a bracket for proper fitment in the center console.
- Slide the steel or plastic stereo bracket over the new head unit.
- Use the Phillips screwdriver to secure the bracket to the unit.
- Mount the bracket cover onto the center console with four Phillips screws.
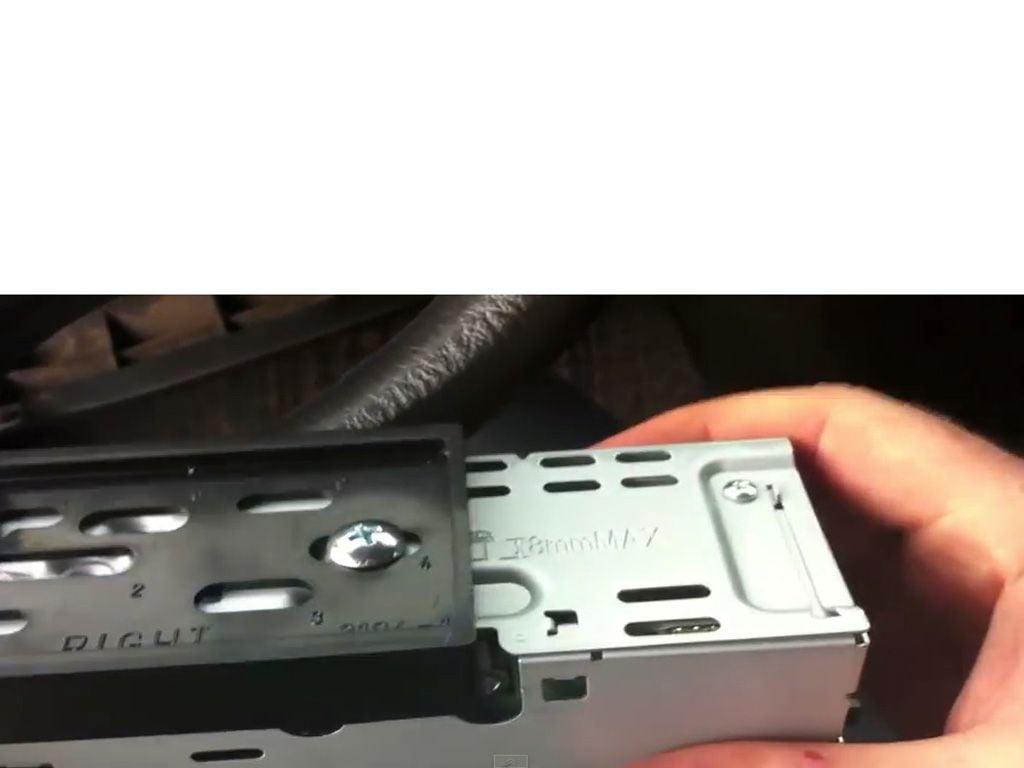
Figure 10. Install the stereo bracket. 
Figure 11. Mount the stereo bracket cover.
- Connect the aftermarket wire harness to the console wire harness.
- Connect the antenna adapter into the stereo head unit.
- Slide the new stereo head unit into the center console, and tighten the mounting screws.

- Snap on the center console cover over the new stereo head unit.
- Reattach the center console trim cover.
- Fasten the screw behind the small hook.
- Reattach the lower dash trim panel.
- Then, snap on the stereo's face plate and test the unit.

Featured Video: Car Stereo Removal and Repair
Related Discussions and Video
- New Headunit - DodgeForum.com
- Wiring Diagram and Pinout For 07' Ram Radio - DodgeForum.com
-
Kenwood Stereo Installed in the Dodge - YouTube.com