Dodge Ram 2002-2008: How to Hardwire Subwoofer
Wiring subwoofers into your Dodge Ram takes some time, but it's not as hard as it sounds. With some patience and knowledge, you can easily run the wires throughout your chassis. The following instructions provide the knowledge you need to do so.
This article applies to the 3rd Generation Dodge Ram (2002-2008).
There is nothing better than being able to listen to your favorite band at the volume you want. A subwoofer allows you to listen to those low base lines that you would miss in a stock setup. An advantage, however, is you can use a standard head unit by simply installing a Hi-Lo converter, which attaches to an amplifier. All of these components and wires can be nicely hidden inside the cabin of your truck, generally under the rear seats. Although installing a sub through an audio company can cost upwards of thousands of dollars, you can do it yourself in your Ram truck for just the cost of the units.

Materials Needed
- T20 Torx screwdriver
- Drill and drill bits
- Ratchet with 7mm socket
- Hi-Lo converter box
- RCA cables
Although this DIY articles focuses on Quad Cab Dodge Ram models, these instructions also apply to Regular Cab Ram models, minus the details regarding the rear seats.
Step 1 – Disconnect battery and remove rear seats
- As always, when working on anything that involves the truck's electrical system, disconnect the negative battery cable (black) to avoid major shocks and injuries.
- Loosen and remove the four bracket bolts holding the rear seats in place.
- Then pull out the rear seats from the cabin.
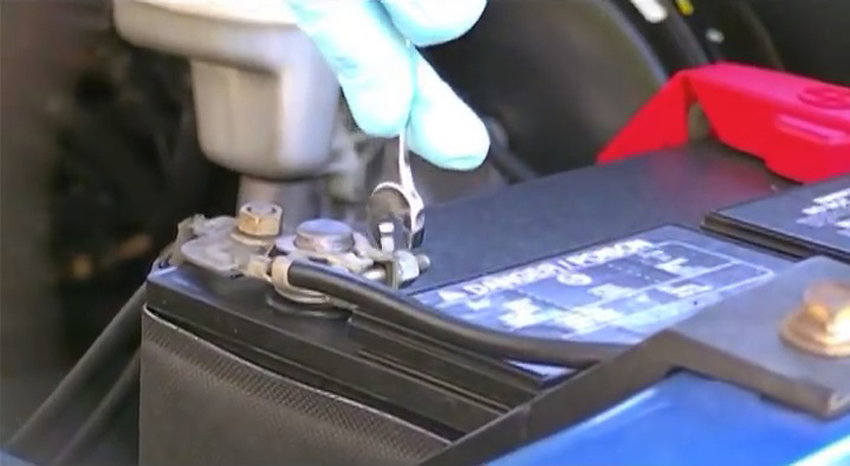
Figure 1. Disconnect the negative battery cable (black). 
Figure 2. Remove the rear seats.
Step 2 – Remove the bottom door sill trim
Next, you'll need to make some space so you can run the subwoofer wires through the cabin floor.
- To do so, simply grab the edge of the driver's side door sill and pull it out.

Step 3 – Drill a hole through the firewall grommet
To route the subwoofer's power wires, you must drill a hole through the engine firewall. Although you can choose a different location to create a hole, drilling into the rubber grommet is an excellent spot as it will protect the dashboard wiring.
- Use a power drill and appropriate size drill bit to make a hole in the firewall grommet. Make sure not to damage wires on either side of the firewall.

Step 4 – Install the line-out converter box
The Hi-Lo converter box is essential for connecting the subwoofer and amplifier to the stock radio unit.
To wire the system:
- Use a T20 Torx screwdriver to remove the center console bezel screws. Then remove the bezel.
- Use a ratchet with 7mm socket to remove the four mounting bolts on each corner of the radio.
- Slide out the radio head unit and disconnect its wire harness connector.
- Use the radio wiring diagrams in Figure 5 below to cut the correct wires.

- Locate the stock speaker wires and cut them.
- Then wire the appropriate speaker wires to the Hi-Lo converter box.
- If you're installing a low wattage system, you can run a 9-wire cable directly to the amplifier and retain a nice sounding system; however, if you're using a more powerful amplifier, you will have to route a new speaker wire into each individual speaker.
- Place the radio back into the center console and mount it using the four 7mm bolts.
- Reattach the center console bezel and secure it using the two T20 Torx screws.

Figure 6. Wire the Hi-Lo converter to the speaker wires. 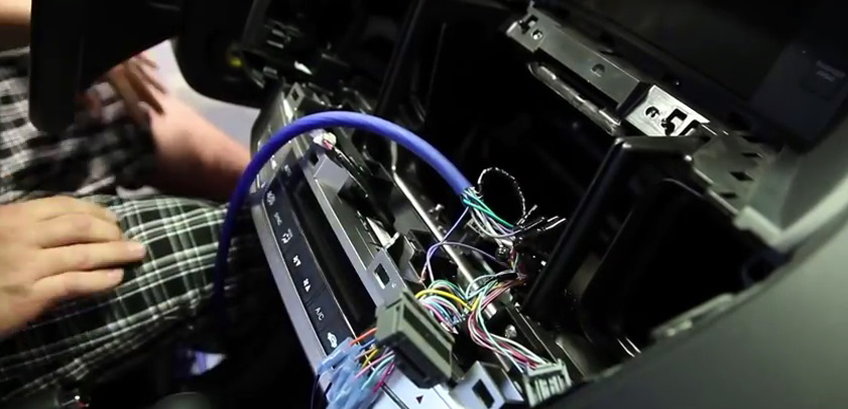
Figure 7. Wire 9-wire cable to the speaker wires and route it to the amplifier.
Step 5 – Mount the amplifier and subwoofer
- Bolt the amplifier to the chassis. If you can not find bolt locations, you can drill your own to secure it.
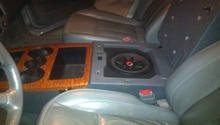
- Mount the subwoofer to an area near the amplifier.
- Connect the Hi-Lo converter box to the amplifier using the RCA cables.

Figure 8. Simple subwoofer wire diagram. 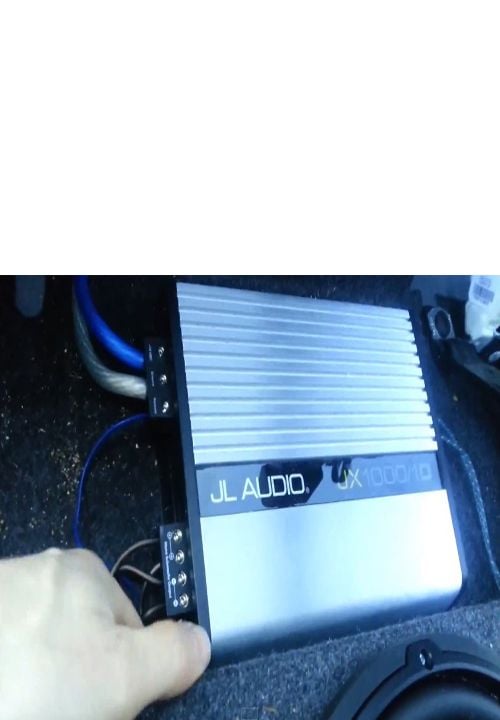
Figure 9. Bolt down and wire the amplifier.
- Ground the amplifier to a metal bolt on the chassis.
- Route the power wire underneath the floorboard, through the firewall, and to the battery.
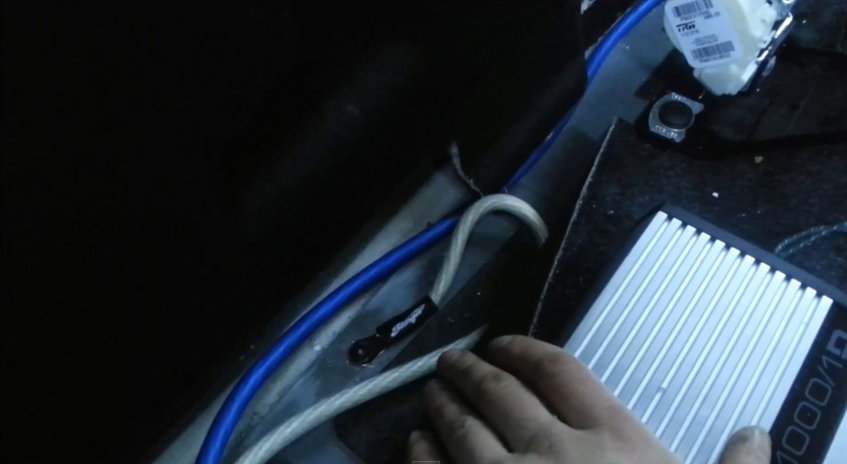
Figure 10. Ground the amplifier. 
Figure 11. Route power wire through rubber grommet in the firewall. 
Figure 12. Connect the power supply wire to the battery.
Step 6 – Re-install the interior components
- Snap the removed interior trim pieces back into place.
- Haul the back seats in (if applicable) and bolt it down.
- Reconnect the battery, start your truck, play a song with low bass, and enjoy.

Featured Video: Subwoofer and Wire Amplifer Installation
Related Discussions and Video
- Stock Head Unit Subwoofer Install (DIY) - DodgeForum.com
- Amp and Sub W/Stock Radio - DodgeForum.com
- How To Install a Line Out Converter | Installation and Tips - YouTube.com