Dodge Ram 1994-2001: How to Vinyl Wrap Dashboard
Learn how to give your Ram's dashboard a new and fresh look for not a whole lot.
This article applies to the Dodge Ram 1500 2nd Generation (1994-2001).
Most make sure to keep their Dodge Rams nice as well as shiny by washing and waxing the exterior. But when it comes to the interior, a light wipe and vacuuming is about all it gets. Over the years, elements such as the harsh UV sun rays, buildup of dust and grime, and the every day wear and tear start to punish your dashboard's leather or vinyl dashboard. Cracks are the most common form of dashboard damage, and usually require the whole dashboard panel to be replaced as a fix because having it repaired can get rather expensive. Here is a step-by-step guide for an alternative way of fixing your dashboard by adhering a vinyl cover to it.

Materials Needed
- Fiberglass joint tape
- Fiberglass resin
- Bondo Body Filler
- Contact cement (1 qart)
- Parchment paper
- Vinyl cloth (measured to dashboard dimensions and interior color)
Step 1 – Fix the old dashboard
Before planning and outlining your new dashboard cover, you must make sure the surface of the damaged dashboard is clean and in solid shape for the vinyl to be properly laid down.
- If you currently have any cracks, splits, holes or tears on the dashboard, you will want to use fiberglass resin as well as Bondo Body Filler to fill them in and cover them.
- Once they're covered, lay down the mesh of the fiberglass joint tape to make sure the vinyl adheres to a porous surface. The goal is to get the dashboard as solid and smooth as possible to lay down the new cover nicely and securely.
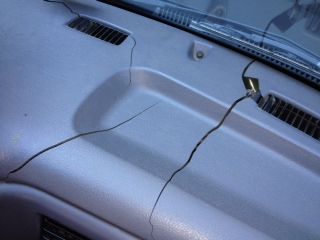
Figure 1. Fill in the cracks in the dashboard. 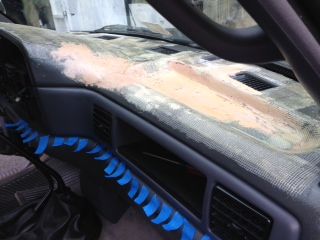
Figure 2. Patched and covered cracks.
Step 2 – Prep the vinyl wrap
Before the vinyl can be installed, you must cut it to fit your dashboard. The simplest way of doing this is to lay the wrap on your dash and cut out a general outline. Then wait to trim the edges after the vinyl wrap has been installed.
- First, make sure the dashboard is clean and its surface is smooth.
- Lay your cut-out vinyl face down on a flat surface. Then apply a moderate amount of wet contact cement to the bottom side of the vinyl as well as on the dashboard.
- Lay the parchment paper on the wet contact cement on the dashboard. Because the parchment paper will not stick to the cement, doing this will allow you to freely apply the vinyl without the risk of getting its clean side covered in cement.
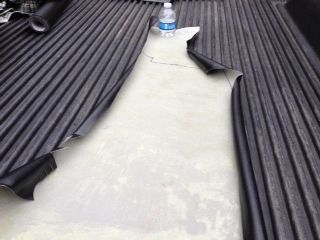
Figure 3. Lay down and cut out the vinyl. 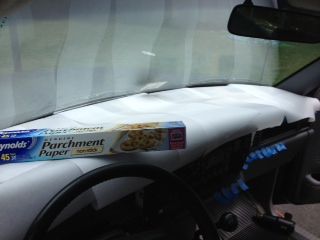
Figure 4. Lay down the parchment paper.
Step 3 – Install the vinyl wrap
- Lay down the vinyl wrap on top of the parchment paper, and make sure it's situated nicely.
- Once the vinyl is set in place, slowly peel off the parchment paper section by section. The goal here is to fine tune the proper fit of the vinyl with the parchment paper, buying you some time before the wet contact cement sets in.
- Once you've fully applied the vinyl, cut the excess wrap and tuck it into the right grooves as well as cracks around and on the edges of the dash.
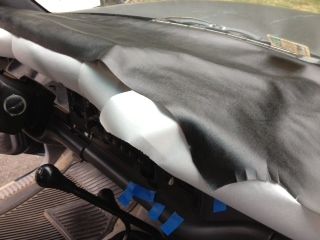
Figure 5. Lay vinyl wrap on top of the parchment paper. 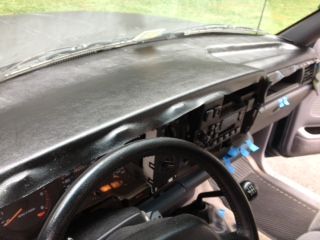
Figure 6. Slide out the parchment paper piece by piece. 
Figure 7. Trim the vinyl wrap as needed.
Step 4 – Wrap up
- After trimming the excess vinyl, spend some time "massaging" vinyl into the hard-to-get corners and bends. The more you take your time to ensure a proper fit, the better results you will get.
- Make sure to let the entire dash rest and dry in the shade for at least eight to ten hours before placing anything on it.
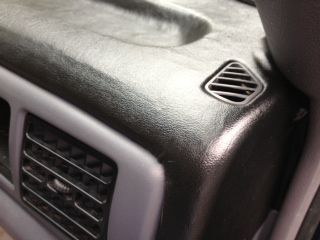
Figure 8. Pay extra attention to the corners. 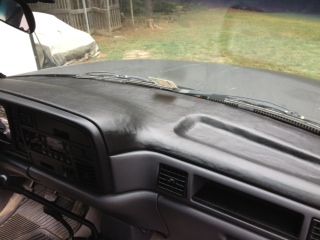
Figure 9. Vinyl-wrapped dashboard.
Related Discussions
- How to Cover a Dodge Ram Dashboard With Vinyl - DodgeForum.com