Dodge Ram 2009-Present: How to Stop Third Brake Light Leak
Water leaks are no good. They can ruin your interior and leave musty odors. The third brake light is known to leak, find out how to prevent this from happening.
This article applies to the 4th Generation Dodge Ram (2009-Present).
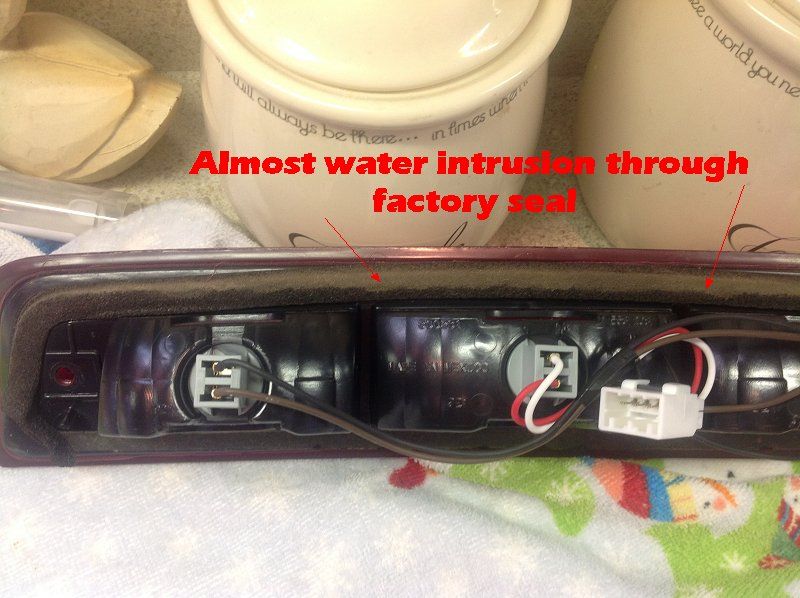
It is reported that on fourth generation Dodge Ram trucks, the brake light located above the rear sliding window that leads to the truck bed—otherwise known as the "third brake light"—happens to allow water into the cabin. The problem lays with the seal used in the light housing that wears out over time, and exposes the interior of the truck to the elements. Here is a step-by-step guide to show you how to replace the seal and fix the leak. Although this is a simple fix, visit your local dealer or repair shop if you don't know how to perform this repair.

Materials Needed
- Phillips screwdriver
- Foam seal or silicon
- Rubbing alcohol
- Paper or shop towels
- Razor blade or knife
Step 1 – Remove light
Start by climbing in the bed of your truck and locating the two screws at each end of the third brake light housing. Use a Phillips screwdriver to remove these. Once the screws are out, wiggle the housing apart from the body but not too far, as the light is still connected. Then carefully un-clip the wiring connector and fully remove the housing.

Pro Tip
Make sure to set the screws aside, as you will re-use them when installing it back.
Step 2 – Remove seal
Lay the third brake light housing face down on a flat surface with a towel or something padded to prevent it from getting damaged or scratched. Use your razor blade or knife to carefully strip away the old seal. Once the seal is removed, use a damp paper towel with some rubbing alcohol and clean whatever foam or glue residue the old seal has left behind. This will help the new seal adhere better.
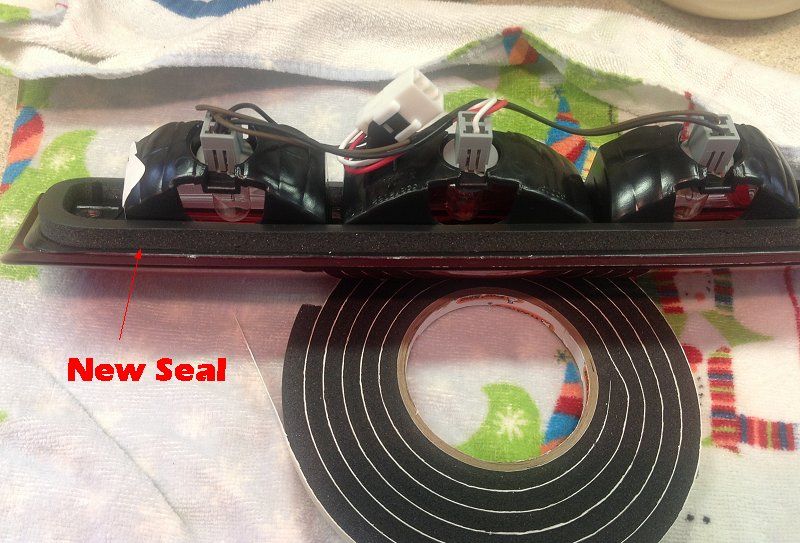
Step 3 – Install new seal
With the old seal removed and the surface clean, grab the new foam seal out of the bag, remove the plastic strip to expose the adhesive, and carefully lay it along the same outline as the factory seal. Make sure that you do not stretch the seal as you are applying because this will reduce its effectiveness. Always cut and overlap at the end to make sure there are no gaps in the outline.
Step 4 – Wrap up
Make sure to let the adhesive dry and settle for ten minutes or so, and then mount the light housing back on the truck in reverse order as it was removed.
Follow these steps:
- Connect wiring connector.
- Mount light housing in place.
- Replace both Phillips screws.
Related Discussions
- Third Brake Light Water Leak DIY Fix - DodgeForum.com
- Third Brake Light Leaking - DodgeForum.com
- Leaking Near Rear Window - DodgeForum.com