Dodge Ram 1994-2001: How to Replace Brake Line
Fixing corroded brake lines is absolutely essential for driving safety. This guide will give you instructions on doing your own brake line repair or replacement in the Dodge Ram.
This article applies to the Dodge Ram 1500 (1994-2001).
If you live in a northern state, the salt used on the roads during winter can be really corrosive to your rear brake lines. It's not uncommon to replace a bad section of a brake line and it is possible to do it yourself. It'll require a few special tools and plenty of patience. For this tutorial we'll be focusing on the rear brake lines, but these instructions can be applied to any section of hard brake lines. It's always recommended you replace bad brake lines as soon as you notice them.
Materials Needed
- Stainless steel brake line
- 3/16" brake line fittings
- Brake line plug
- Tube bender
- Tube cutter
- Double flare tool
- Flare wrenches
- Box ended wrenches
- Ratchet and socket set
- Drain pan
- Undercoating spray
- Brake fluid
- Jack
- Jack stands
Before you start, lift the truck using a jack and set it on four jack stands.
(Related Article: How to jack Up Your Truck - DodgeForum.com)
Step 1 – Lower fuel tank
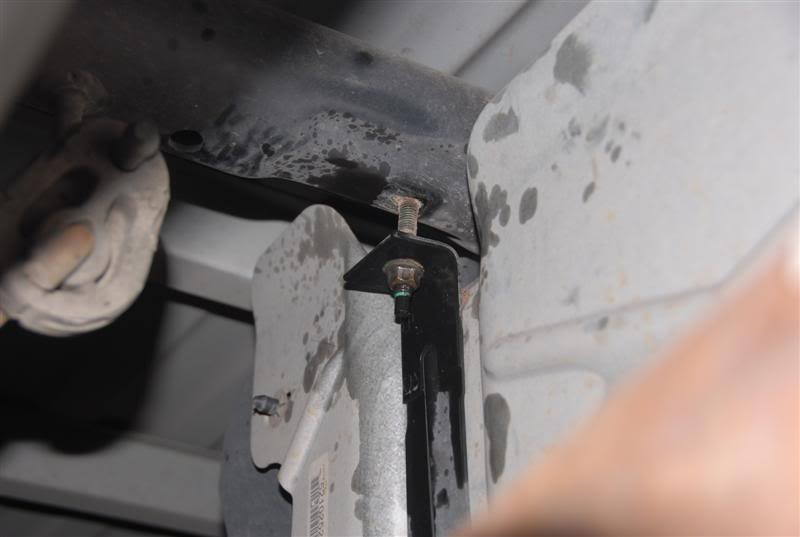
The brake line runs directly behind the fuel tank, but it is possible to get around it without having to fully drop the fuel tank. Put a jack underneath the tank as a support, then loosen the bracket bolts that hold the tank near the brake line. Lower the tank on the jack, then push it out of the way so you can work with the brake line.
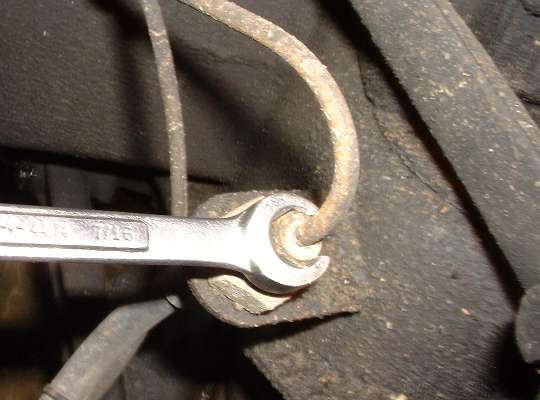
Step 2 – Remove old brake line
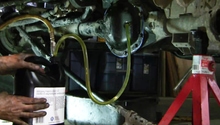
Start at the end farthest from your brake calipers and have your drain pan ready to catch any brake fluid. Loosen the fitting with your flare wrench then remove it by hand. Move to the opposite end and disconnect it from the flex hose. Once the brake line is loose, drain any remaining brake fluid into the pan.
Pro Tip
To prevent brake fluid from spilling out from the master cylinder, use a brake line plug on the disconnected section of the brake line.
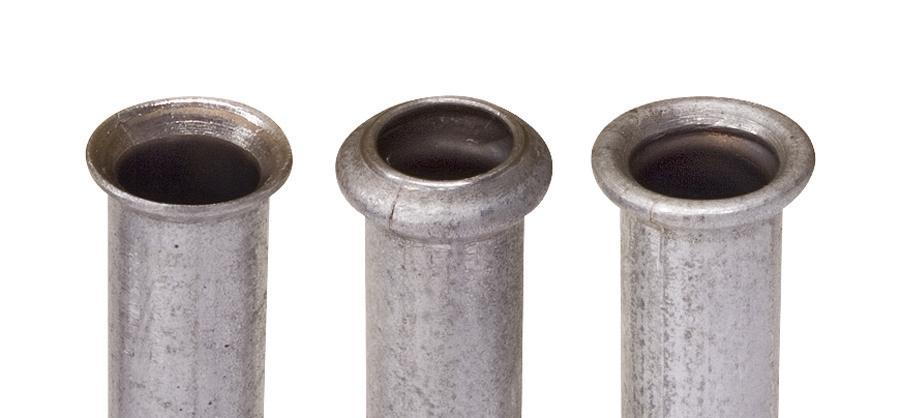
Step 3 – Bend and flare your new brake line
Insert a fitting to the new brake line, then flare the tip of the brake line to a double flare. Measure out a length of brake line to match your old line, then cut it. It's better to have too much brake line than too little. Bend your brake line with your bending tool using your old brake line as a model. It doesn't need to be precise, but it needs to fit where the old line was. Once you're finished, insert another fitting to the other end of the line and flare that end as well.
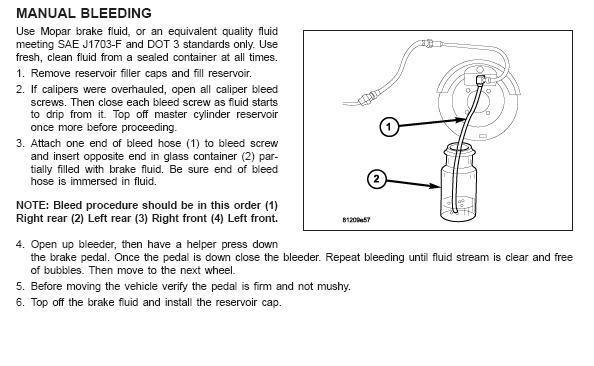
Step 4 – Install new brake line
Fit your new brake line under the truck and reconnect it to the brackets. Tighten down both ends of the brake line. You'll need to bleed the air out of the brakes. For this part it helps to have a friend along. Set your drain pan underneath the brake caliper and loosen the bleeder screw. Have your friend pump the brakes a few times to force the air out of the brake line. When brake fluid starts pouring out, stop and tighten the bleeder screw. When you're done, refill the brake fluid in the master cylinder then raise and secure the fuel tank.
Pro Tip
Before you get your new brake line dirty, you may want to spray on some undercoating. This will help prevent rusting in the future.
Featured Video: How to bend and flare brake lines
Related Discussions
- Rear Brake Line on Driver's Side? - DodgeForum.com
- Replace Brake Lines? - DodgeForum.com
- Brake Line Leak Near Gas Tank - DodgeForum.com
- Brake Line Failure - 1996 Ram 1500 - DodgeForum.com