Dodge Ram 1994-2001: How to Replace Master Cylinder
If you feel any change in your brakes, then your Dodge Ram's master cylinder might be in trouble. Learn how to replace it here.
This article applies to the Dodge Ram (1994-2001).
As these trucks get older and older, brake jobs will start to take more than a pad and rotor change. There are many other parts in a Dodge Ram's brake system that require replacement or overhaul after many miles. One of these parts is the brake master cylinder. As you depress the brake pedal you actuate a piston that is sealed inside a metal cylinder. This then creates hydraulic pressure, which then uses the brake fluid running through the brake lines to actuate the brake caliper. Due to the fact that brake fluid is highly corrosive, over time, it eats away at the seals and inside of the master cylinder and piston. This then causes small leaks and keeps it from creating as much pressure as it once did. The easiest way to fix this issue is to swap out the master cylinder for a new one. It is also possible to rebuild the master cylinder but due to the fact that master cylinders are not all that expensive, it's a much better choice to just replace it with a new one.
A common master cylinder on most passenger vehicles has two circuits. One circuit is for the front brakes and the other is for the rear brakes. Changing out the master cylinder will change both circuits due to the fact that they are part of the same master cylinder.
This is also a great opportunity to flush and refill your brake system with new, fresh brake fluid.

Materials Needed
- Flare nut wrench set
- 15mm socket
- Ratchet
Before beginning, make sure that you are replacing your master cylinder with the correct size replacement master cylinder. Failure to do so can result in inadequate braking performance, and that can be very dangerous. There are identification tags and markings on these master cylinders that will help you identify which one you have and help in checking to see if the one you are using as a replacement is the correct one.
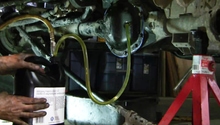
Step 1 – Loosen flare nuts on master cylinder
Before beginning to loosen the flare nuts be sure to place rags or a suitable container to catch the brake fluid that will be leaking out when you loosen the lines. Brake fluid is highly corrosive and will damage paint or any other plastic or rubber it comes into contact with. You also want to be sure to have something ready to cover the ends of the brake lines with to keep debris or contaminants out.
Loosen the flare nuts at the ends of the brake lines where they enter the master cylinder. When they are loose gently pull them out of the way.
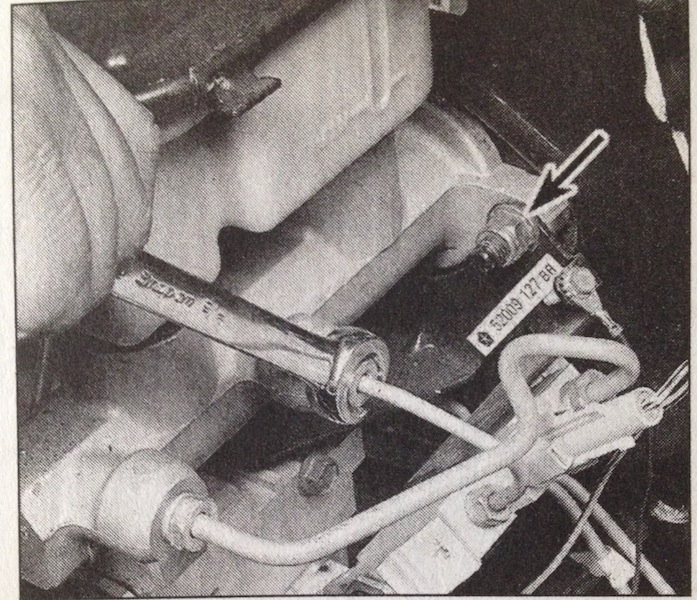
Step 2 – Loosen and remove master cylinder mounting nuts
After you have loosened the lines, you may now loosen and remove the master cylinder mounting nuts. This will allow you to remove the master cylinder from the brake booster. These nuts should be 15mm and there will be two of them.
After you have removed the master cylinder you can remove the cap off the brake reservoir and discard the fluid that is inside of it.
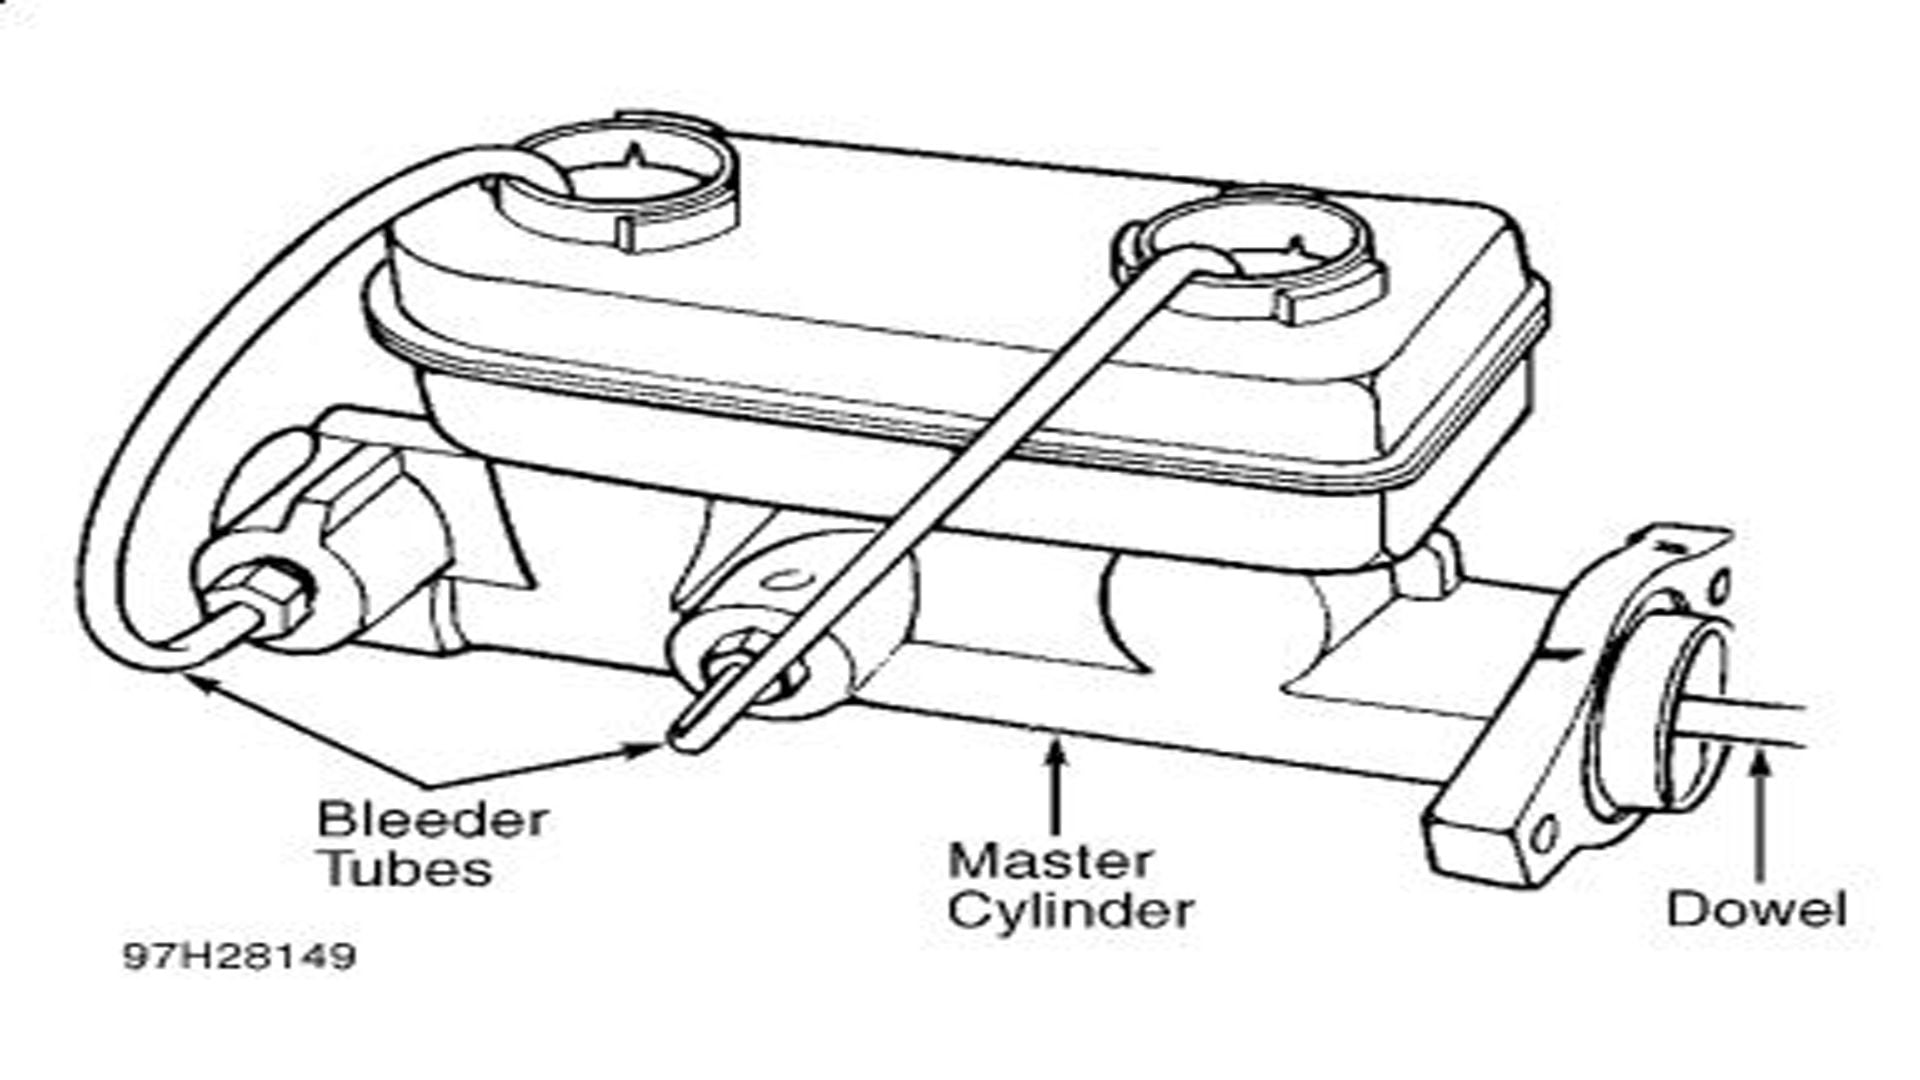
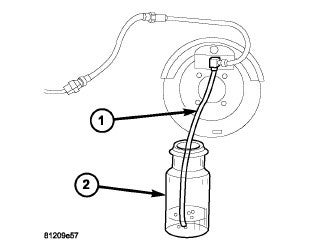
Step 3 – Prepare new master cylinder for installation
Any time you remove the master cylinder or break loose a brake line, the entire brake system must be bled. To save time, you can bench bleed the master cylinder before installing it. That way you will only have to perform the bleeding process on the rest of the brake system after you install the master cylinder.
To perform the bench bleeding process:
- Support the master cylinder either in a vise or on a work bench.
- Fill the reservoirs with brake fluid.
- Hold your fingers tightly over the holes where the brake lines connect to the master cylinder.
- Cycle the piston in and out to make sure all air has been expelled, and so you draw brake fluid from the reservoir in the piston bore.
- Do this until brake fluid is expelled from the holes your fingers are covering. Be very careful not to let air be drawn back into the master cylinder.
Step 4 – Install new master cylinder
Now that you have bled the new master cylinder and filled it with fluid you can install it in place. The installation process is the reverse of removal.
- Install and tighten mounting nuts.
- Reconnect and tighten flare nuts on brake lines.
Step 5 – Bleed brake system
Brake system bleeding is required any time a brake line is loosened or a brake component has been replaced. Bleeding the braking system is necessary to remove any air that might have entered the system.
If a brake line was only disconnected at a wheel, then that specific wheel would only require bleeding. But since both brake lines at the master cylinder were disconnected a full bleeding of the system at all four wheels is required.
Bleed your brakes as follows:
- Remove any residual vacuum from the power booster by applying the brakes multiple times with the engine off.
- Remove the master cylinder's reservoir cover and top off reservoir with brake fluid.
- Reinstall the cover.
- It will be necessary to check the fluid level several times while bleeding the brakes. Never allow it to drop so low that it sucks air into the system because then you will have to start all over.
- Place a piece of clear 3/16 inch plastic tube over the bleeder screw of the brake caliper you are going to bleed. You usually want to start with the brake caliper that is the farthest away from the master cylinder first.
- Pump the brake pedal three times and hold it down.
- Have an assistant open the bleeder screw and allow fluid to exit the screw. Once you don't see air bubbles in the fluid, close the valve.
- Check the fluid level and move onto the next wheel.
Related Discussion
- DIY Power Booster Repair - Dodgeforum.com