Dodge Ram 2009-Present: How to Install Cabin Clearance Lights
Thinking about adding cabin clearance lights to your Dodge Ram? It’s a great feature to put on your truck, as they help increase the visibility of your truck on the roadway at night. Learn how to add this feature yourself here.
This article applies to the Dodge Ram (2009-present).
Cabin clearance lights are a nice add-on for your Dodge Ram because they give your truck better visibility to other drivers when on the road at night, and they also give your truck a nice new look. If you have a few hours to spare and are fairly comfortable working with electrical systems, then this is an add-on you can do yourself. Learn how by reading through the following steps.
Materials Needed
- Cabin clearance lights
- Tape measure
- Torx wrench
- Socket set
- Drill and drill bit
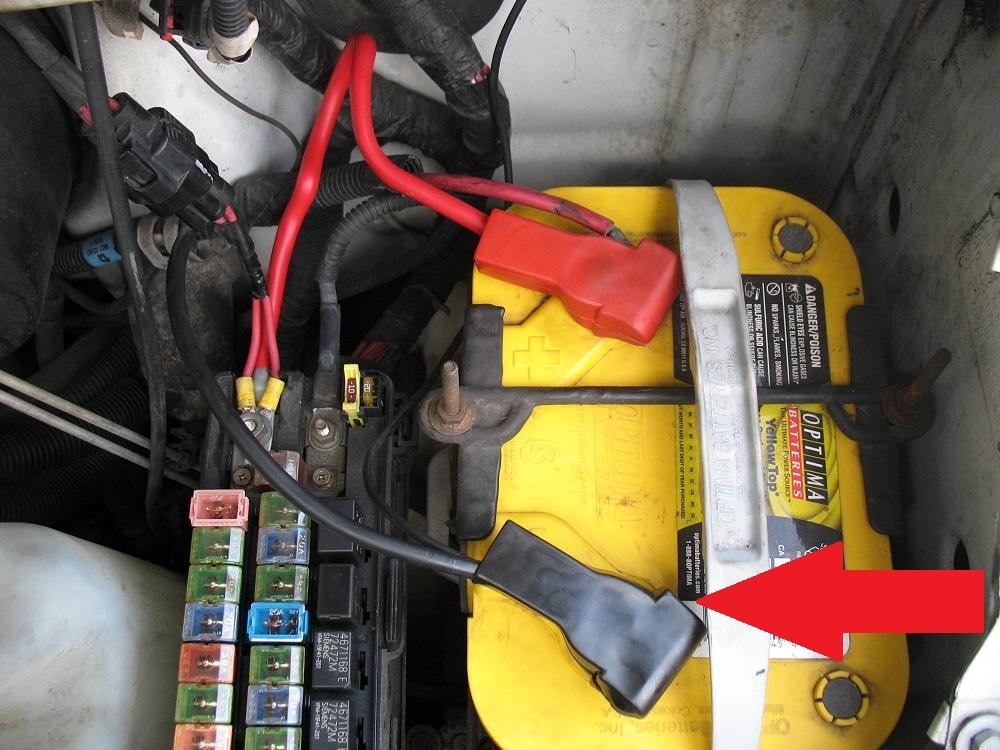
Step 1 – Disconnect the battery
You will be working with the vehicle’s electrical system, so take a second to disconnect the battery to avoid risk of shock.
Step 2 – Take measurements
Place all of the lights on the roof of your Dodge Ram and take measurements with tape measure. You’ll want to place them with about 4 ¾” windshield gap, and outers with about 2 3/8” side gap. Space the others accordingly.
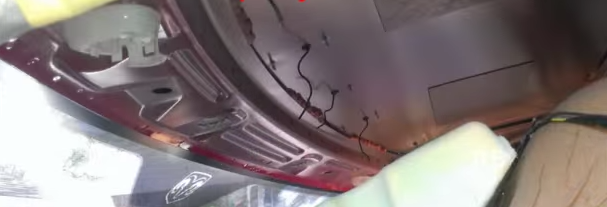
Step 3 – Remove panels, handles, seat belt bolt, and visors
- In order to properly wire this system, you’ll need to remove both side panels and handles along with the seat belt bolt (very tight) – Torx on handles and bolt use a cheater bar on ½ drive ratchet.
- By removing the truck’s side panels, the headliner can fall down some more. Any weatherstripping that comes off in the process will go right back into place.
- Handles will come off with relative ease.
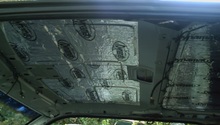
- Per the visors, you need to remove both sun visors as well as visor lock and center light console (latter two have Torx bolts). These can be a bit tricky, so take your time, but once everything is out, the headliner will start to fall from the roof.
Step 4 – Locate factory connector
The factory connector is on the right front pillar and has two wires. One is hot with lights on, the other is the ground. In all likelihood, your truck’s lights ground on the roof, so you can run one wire to the system using scotch locks.
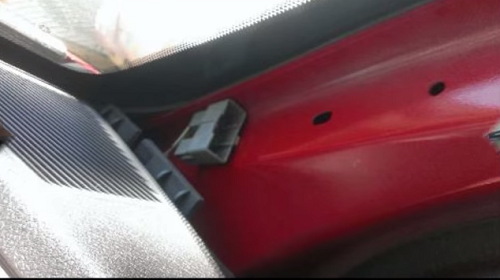
Step 5 – Place the wire
A good way to place the wire is to have it run through the holes in the pillar using a coated connector to plug it in so that it’s not in contact with the ground.
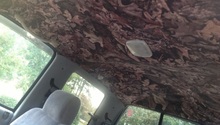
Step 6 – Drill holes into roof of truck and mount lights
Now that everything is exposed and the wire is set up, you can move ahead with securing the cab lights to your truck. Use a sharpie marker to locate where you need to drill, then use self-tapping screws ¾” long (#10s). Move ahead with drill and proceed to drill with 3/8” drill bit. Once holes have been created, place grommets so the wires don’t rub on the sharp metal.

Begin mounting lights and run wires through to the inside cabin of the truck.
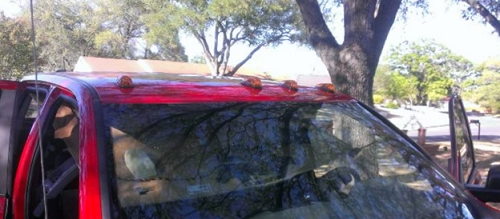
Solder wire to aforementioned factory connector to complete circuit.
Step 7 – Replace all parts
- Place the headliner back onto the roof, replace all visors and bolts.
- Replace handles and seat belt bolt – take time to ensure snug, full tightening of the seat belt bolt.
- Replace panels and secure into place.
- Re-connect the battery when finished.
Featured Video: Dodge Ram Cab Lights Installation
Related Discussion
- The Definitive Cab Clearance Lights for 4th Gen Ram Pics and Info - Dodgeforum.com