Dodge Ram 2002-2008: How to Replace Oxygen (O2) Sensor
The engine computer references the oxygen sensors to determine how much oxygen is in the exhaust compared to the amount of oxygen in the atmosphere. The sensor voltage is created by chemical reactions that the computer uses to determine the correct amount of fuel to be injected into the engine. Oxygen sensors can fail as the miles pass, due to carbon buildup and breakdown of the internal parts from heat cycles.
This article applies to the Dodge Ram 3rd Generation (2002-2008).
The third generation Dodge Ram uses four oxygen sensors: two in front of the catalytic converters and two after. The ECU references the front two sensors for fuel control. The rear oxygen sensors are used to monitor the efficiency of the converters primarily for emissions purposes. The sensors are commonly identified by the names Sensor 1 Bank 1 or Sensor 2 Bank 2. These numbers correspond to which exhaust pipe the sensor is located on, and where the sensor is located in relation to the exhaust manifolds.
Oxygen sensors include many specialized working parts that create the reaction to generate its own voltage. Some reasons you may be seeing an oxygen sensor related code are excessive carbon buildup on the sensor, damaged ceramic coatings or zirconium elements, and electrode failures. Shorts, opens, and high-resistance in the circuits' wiring can also cause a non-functioning sensor or a sensor with erratic readings.

Materials Needed
- 22mm box-end wrench
- Floor jack
- Jack stands (2)
- Block of wood (optional)
- Penetrating fluid
- Anti-seize
- Scan tool (optional)
It's recommended genuine Mopar oxygen sensors are used for best results. The part numbers are 56041698AA for the upstream sensors and 56041706AA for the downstream. These part numbers apply to the 5.7 liter Hemi engine.
Step 1 – Raise and support front of the truck
First, set the parking brake. Using your floor jack, raise each side of the truck and place jack stands under the frame rails. A block of wood can be placed between the frame rails and jack stands to minimize the chance of damage occurring from the pointed areas of the stands.

(Related Article: How to Jack Up Your Truck - DodgeForum.com)
Step 2 – Disconnect electrical connectors from oxygen sensors
Once you are under the vehicle, apply some penetrating fluid where the sensor meets the exhaust. The dirtier your truck is, the higher the chance your sensor may be seized onto the pipe.
Follow the wiring up from which ever sensor you are replacing. You will find where the connectors meet. If you can't reach the connectors, you will have to remove the wiring from any clips or push pins that hold the wiring in place. Grab the connector and lift up on the locking tab located on the sensor side while pulling them apart.
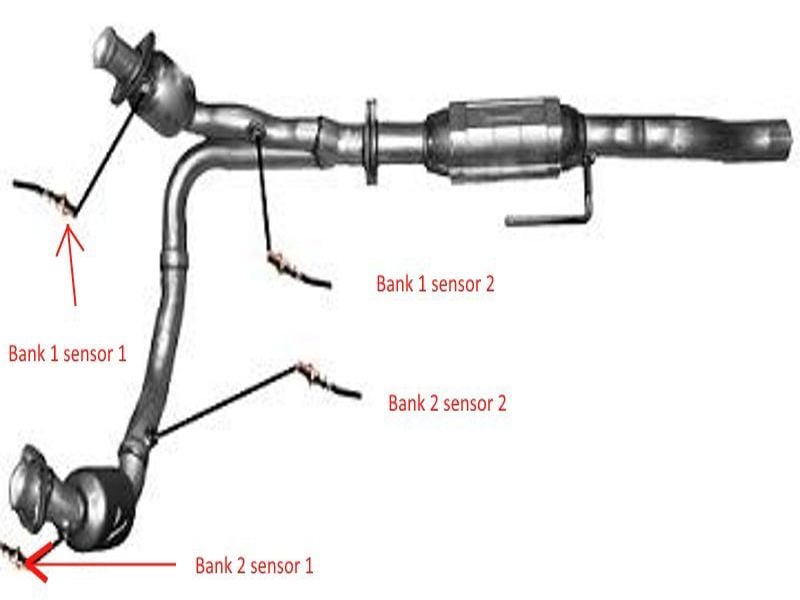
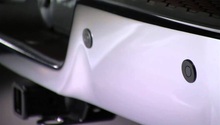
Figure 2. The locations of the four oxygen sensors. 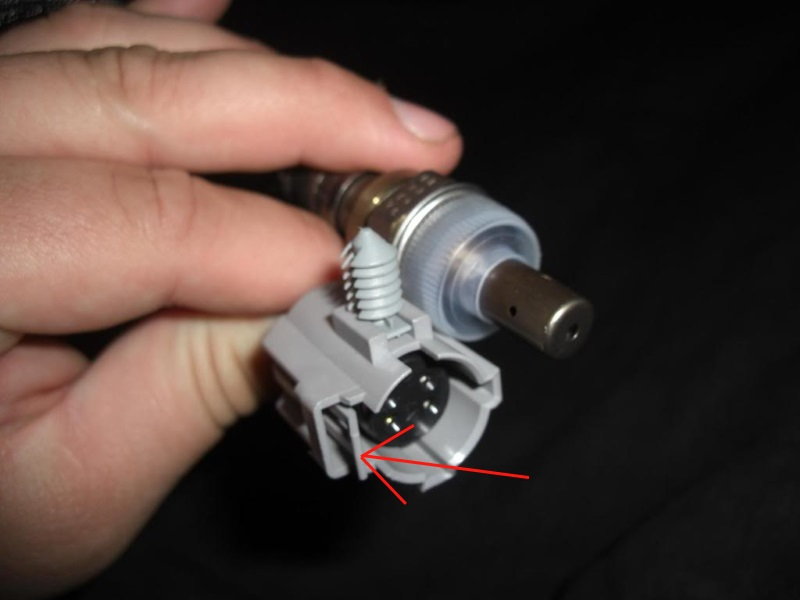
Figure 3. The red arrow points to the locking tab.
Step 3 – Remove oxygen sensor(s)
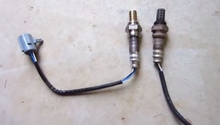
If you are sure you will not be using the sensor again, you can cut the connector plug off and slide a 22mm box-end wrench onto the sensor. Otherwise, you will need the appropriate oxygen sensor socket. It will take some force to break the sensor loose. Turn the sensor in a counterclockwise direction.
Step 4 – Install new sensor(s)
The new sensors may have a plastic cap over the threads that needs to be removed. If there is no anti-seize on the threads, apply a small amount. Start the oxygen sensor by hand, and then torque the sensor to 22 ft./lb. Make sure the wiring is routed correctly once the connectors are plugged together.
Step 5 – Complete the installation
Raise the truck back up and remove the jack stands. Using a scan tool, erase the system trouble codes. If you do not have a scan tool, driving for 10 to 20 miles may erase the code.
Featured Video: Changing Oxygen Sensor
Related Discussions
- 5.7L Hemi Oxygen Sensor - DodgeForum.com
- Oxygen Sensors - DodgeForum.com
- O2 Sensor Problems - DodgeForum.com