Dodge Ram 1994-2001: How to Replace Crankshaft Position Sensor
A bad crank position sensor can throw ECU codes and cause driveability issues. Doing the job yourself is doable, but may not be for everyone. Read on to determine if you want to take it on.
This article applies to the Dodge Ram 2nd Generation (1994-2001).
The cranksahft position sensor (CKPS) on the second generation Dodge Ram can be a source of problems as your truck gets older. If your ECU is throwing CKPS codes, it's time to pull out the tools and change it out for a new one. The sensor itself is easy enough to swap out, but getting to it can be a serious challenge for those who aren't especially limber. However, if you are up for the challenge, you can save some money doing it yourself.

Materials Needed
- 1/4" Allen socket or 1/2" socket
- Various extensions and universal joint
- Ratchet
- Tape
- Mirror
Step 1 – Find the sensor
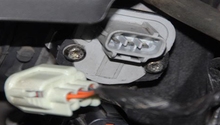
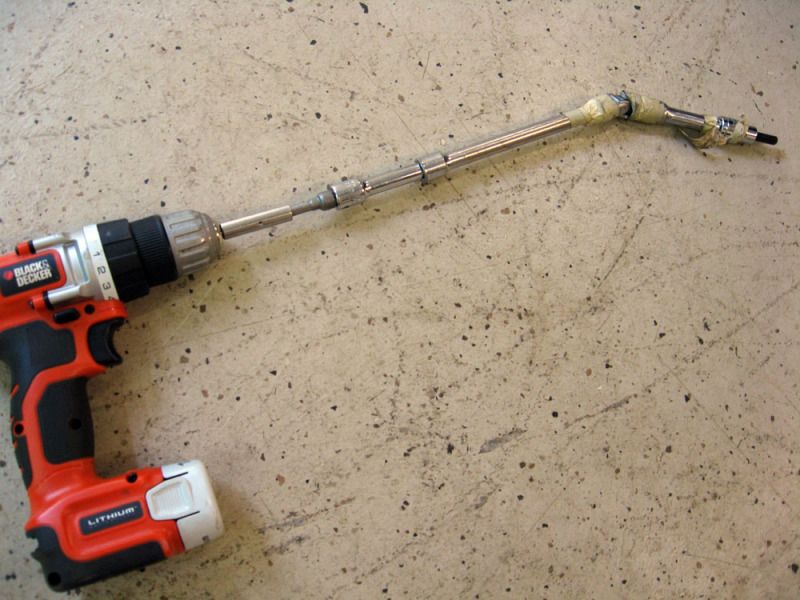
If this is the first time you attempt the fix, then this will be the most difficult part of the job. The sensor is located on the passenger's side, rear of the block where the transmission meets the engine. It uses the flywheel/flex plate teeth to get a signal, so it sits just outside of the diameter of the wheel. Coming from above, you won't be able to see it without a mirror and some luck, so finding it by feel is the best bet. From under the engine, you can get a glimpse of it at just the right angle. It will have two bolts holding it on. These Allen bolts will also accept 1/2" Hex sockets and one harness connector.
Step 2 – Replace the sensor
Use your collection of socket extensions and universal joint to find a combination that allows you access to the bolts. If you chose to go from above, you will need to lie down over the engine and reach your arms behind the head. Going from below will be easier for some. Unplug the harness connector and undo the two bolts. Pull the old sensor out, and set it aside.
Position the new sensor in the same way the old one came out. Getting the bolts started again can be problematic with such poor space and visibility, so expect to drop them below the truck a few times before you get it right. Once they are both started, it's easy to finish them with the ratchet. Factory torque spec is 70 in-lbs (5.8 ft-lbs), but it's impossible to get a torque wrench behind the engine. "Snug" is good enough for most. Re-connect the wiring harness.
Step 3 – Test the truck
Now is a good time to clear the ECU codes, so you can confirm your fix. Fire the engine and double check that it's running normally. Then, take it out for a full drive-cycle. If the code doesn't return, you are done!

Related Discussions and Videos
- DIY - Replace Crankshaft Position Sensor on 2001 Ram 1500 - DodgeForum.com
- Crank Position Sensor - DodgeForum.com
- Replacing Crank Position Sensor...How? - DodgeForum.com
- 1997 Ram 2500 Crank Position Sensor - DodgeForum.com
- Ram 1500 Crankshaft Position Location and Replacement - YouTube.com
- 2000 Dodge 3500 5.9 Diesel Crankshaft Position Sensor Codes - YouTube.com