Dodge Ram 1994-2008: How to Install a Trailer Hitch
The Dodge Ram is already a pretty versatile truck, but in adding a hitch to it, you significantly increase its capabilities. Fortunately, most hitches are sold as installation kits, and you can add it yourself in less than an hour on a Saturday afternoon by following these simple steps.
This article applies to the Dodge Ram (1994-2008).
The Dodge Ram is one of the more solid and powerful trucks on the market today and for good reason, too. It’s designed for a specific audience in mind—the men and women out there wanting to get heavy jobs done that their cars can't accomplish. One of the best ways to increase all that you can do with your Ram truck is to install a trailer hitch. Most hitches are sold as bolt-on full kits, which is convenient because you have the freedom to perform the installation all at once. Follow these simple steps to learn how.

Materials Needed
- Trailer hitch receiver kit
- Ratchet and socket set
- Drill and 12" drill bit
- Dial caliper
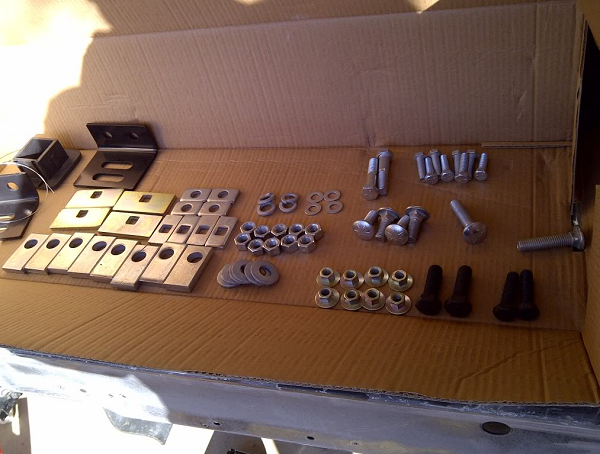
Step 1 – Check the trailer kit parts
There are a ton of parts included with most trailer hitch sets, so take a few minutes before you get started to make sure that everything is included. There's no sense in getting halfway through the project only to realize you’re missing a bolt.
Step 2 – Bolt frame pieces to the rear end
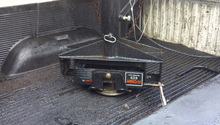
- If a spare tire is still latched to the undercarriage of your Dodge Ram, remove it before starting the installation as it will get in the way.
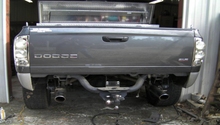
- If you purchased a simple bolt-on trailer hitch kit that is designed for your Dodge Ram year and model, no drilling is require in this step. Simply line up the holes of the mounting frame pieces to the rear frame.
- Then, bolt down the mounting pieces.

Figure 2. Remove spare tire to access bottom of the rear frame. 
Figure 3. Bolt on the frame's rear end mounting brackets.
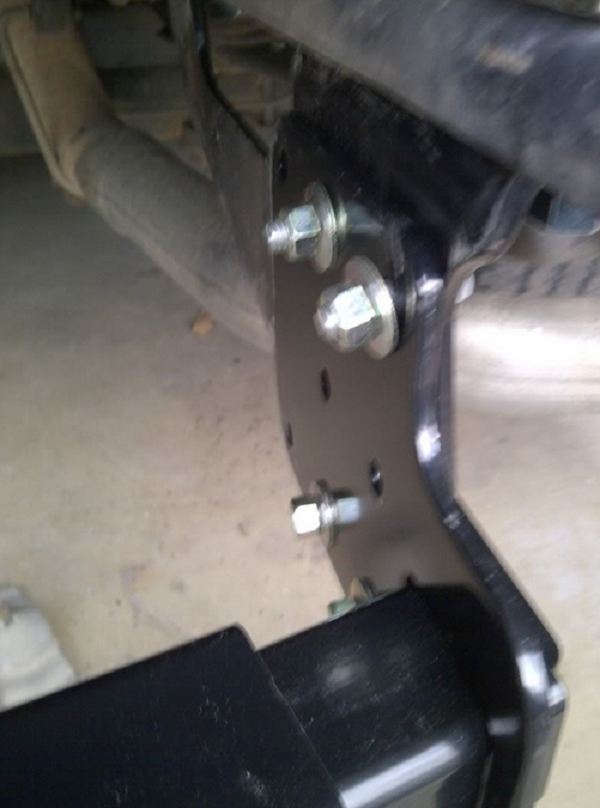
Step 3 – Drill holes in the frame
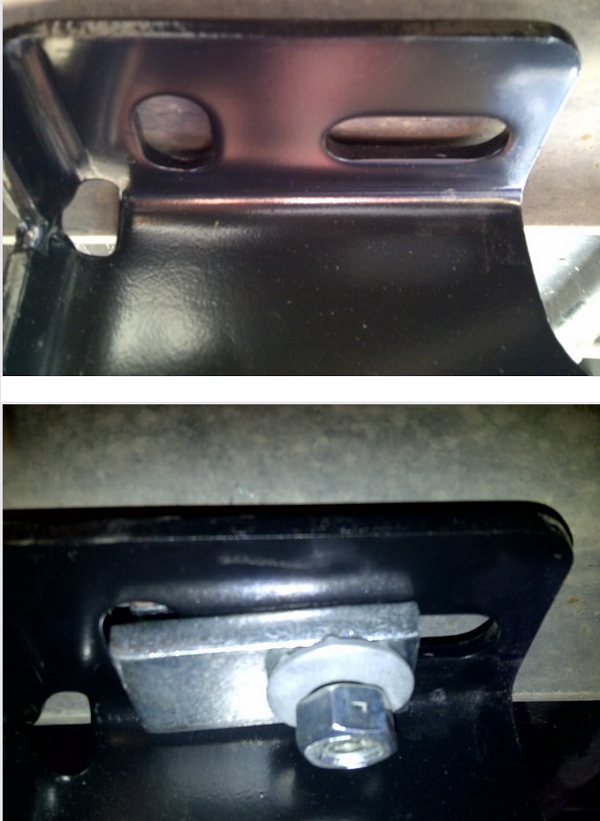
- There are no holes on the front end of the rear frame where you would need to mount the hitch bracket. Position the bracket onto the frame and mark the bracket's 1/2" bolt locations.
- Carefully drill the holes, and bolt the brackets into place.
- You will also need to drill holes on the left and right side of the frame. The right side may be difficult as the exhaust is partially in the way, so take your time to mark the exact locations of the bracket bolt locations.
- Then drill the holes and make sure not to slip off to the side of the marked area.
Step 4 – Install the wire and carriage bolt
The hitch comes with a wire that has a coiled end. Its purpose is to snake the carriage bolts through the inside of the hitch.
- Insert the carriage bolt into the coil located at the end of the wire.
- Feed the wire-end through the hole.
- Then pull the wire until you see the bolt slip out of the hole.
- Tighten down the bolt using a nut that came with the kit.

Figure 5. Snake wire coil through the hitch frame. 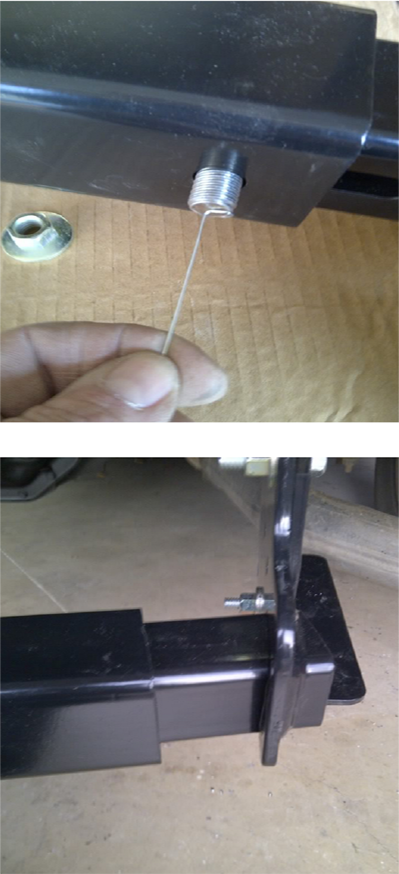
Figure 6. Feed carriage bolt to the end and tighten it down.
Step 5 – Install extra bolts to the end brackets
- Using the extra bolts and nuts provided in the hitch kit, bolt down the end brackets to the hitch. There are pre-existing holes on the end brackets which you can use as a guide.
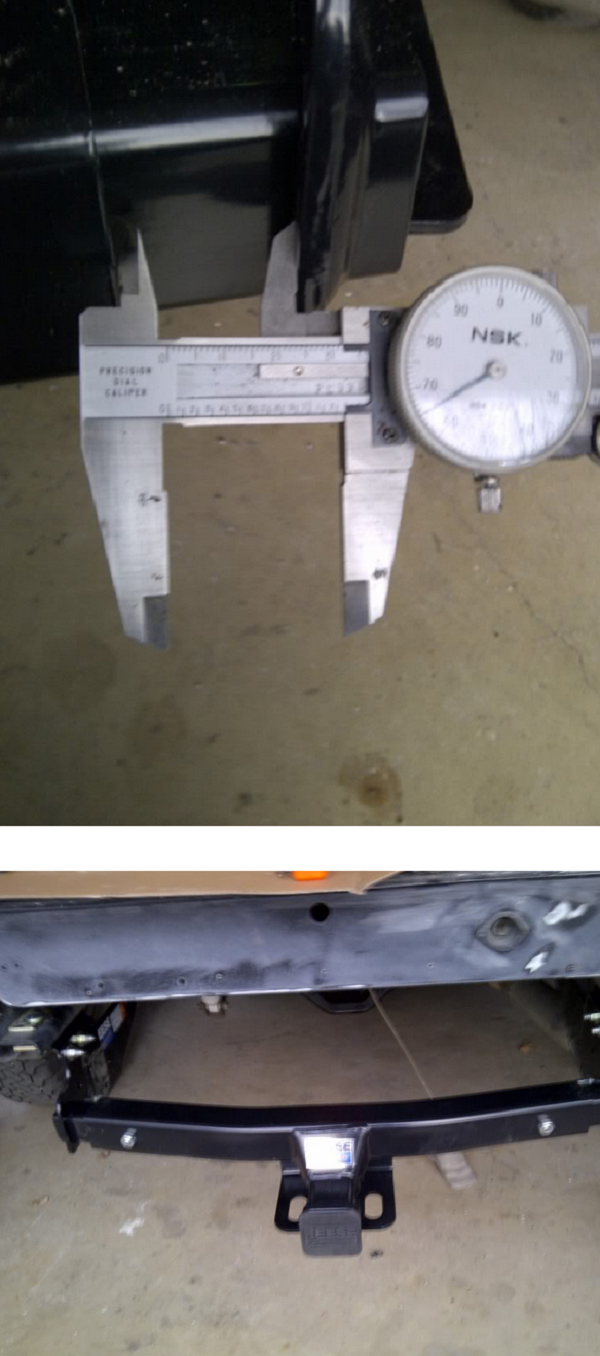
Step 6 – Center the hitch assembly
- Use a dial caliper to measure each end of the hitch frame. Make sure each side is equal so the hitch receiver is properly centered.
- Then torque down the hitch frame to manufacturer specs, taking care not to slide the frame off-center.
- After the installation is complete, you will need to follow up with installing a trailer brake controller.
Related Discussion
- DIY: Bolt-On Almost Trailer Hitch Installation - Dodgeforum.com