Dodge Ram 1994-2008: How to Check for Vacuum Leaks
Over time, rubber breaks down, especially in the extremely hot conditions, under the hood and under the truck near the exhaust. Let's combat that with some troubleshooting tips on how to find a vacuum leak in your truck!
This article applies to the Dodge Ram 2nd and 3rd generation (1994-2008).
Use the tools you have! You may be able to use a check engine light code reader, anything that will create smoke, and even your eyes can be a tool. Sometimes, the problem is one that can be very hard to diagnose using the OBD-II electronic troubleshooting port. And oftentimes, a combination of things will help you figure out what the problem is.
In the early ages of automobiles, the approach was simple. Check for spark, check for air, check for gas and if all that works, it should fire right up. With the addition of modern technology, cars were equipped with diagnostic computer ports to enable easy checking of problems the car might be experiencing. Luckily, this can give you great guidance on troubleshooting your vacuum system!

Materials Needed
- Code reader or vacuum boost gauge
- Redline's Smoke Pro Total Tech Diagnostic Leak Detector kit (or something similar)
Note
If you don't want to buy a scan tool or don't have one, you can stop by an AutoZone and they will scan it for you.
Step 1 – Use a scan tool
Start with the easiest method. Use your code reader to tell you exactly what is wrong and where to look. On your 1994 to 2001 Dodge Ram, one thing you might be told is that you have an EVAP system leak; sometimes small, sometimes large. In this instance, you would be able to track down the offending line that developed a hole and swap it out.

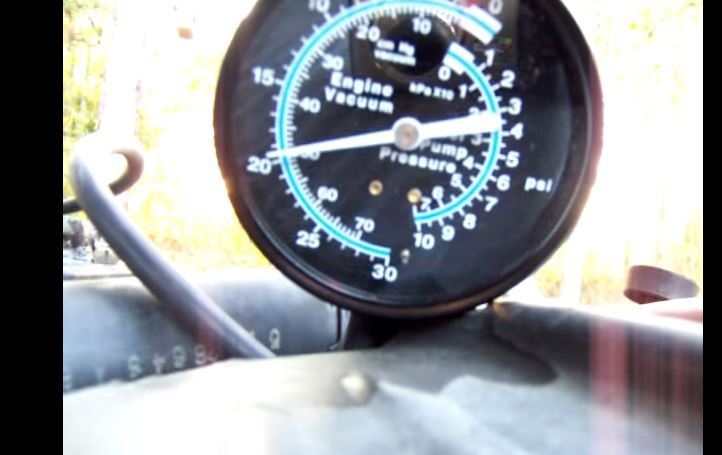
Step 2 – Connect a vacuum boost gauge
This tool helps you track down an issue with your vacuum line when the engine is running and under different conditions. Connect the gauge to the hose you suspect is your issue, and watch the needle's reaction as well as any additional throttle application. If you lose vacuum pressure while the car is running, you likely have a leak somewhere in that line.
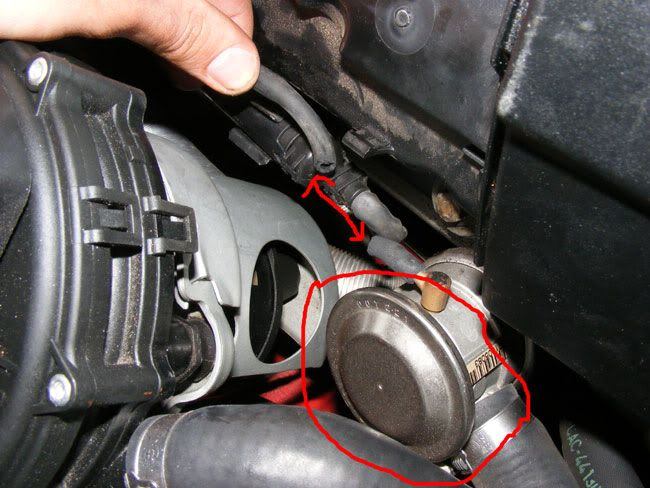
The valve and lines in Figures 3 and 4 are some common spots to check. The source would normally be routed from or through a check valve, which opens/closes when the vacuum is created. Start there! If that checks out, it's time to check all the vacuum lines attached to the intake manifold, as seen in Figure 3. The intake manifold is a common place for vacuum leaks to form, whether it be from attached hoses or from the gaskets that mate the manifold's "runners" to the engine head cylinder. Often times, you can hear the vacuum leak if the manifold is the culprit.

Figure 3. Crankcase ventilation valve. 
Figure 4. Intake manifold vacuum lines.
Step 3 – Compile the data
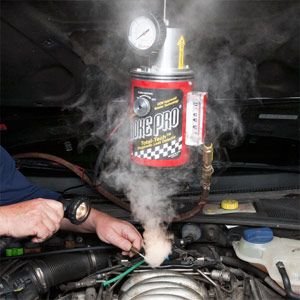
Based on your troubleshooting progress thus far, go ahead and make use of smoke to find the exact location of the leak. You'll have start at the source of the vacuum line and work your way back to the accessory it ends. Between your code reading, vacuum line checking, and the symptoms you're having, you should be able to narrow it down to one or maybe a few possible vacuum lines. Once you find the leak, replace that hose and all should return to normal for you!
Figure 5 is an example of a smoke-producing device (Redline Pro Total Tech Diagnostic Smoke Leak Detector) used to find airflow leaks in your lines.
By the end of your diagnosis, Figure 6 is what you're after! Tada, a HOLE! Replace that line and be on your way! Your truck should now be running as it should. Congrats on finding and fixing the problem yourself!
Related Discussions
- Vacuum Leak, Cruise Control Problem - DodgeForum.com
- Vacuum Leak After Plenum Repair - DodgeForum.com
- Need Help Locating Vacuum Leak - DodgeForum.com
- Cannot Find Vacuum Leak - DodgeForum.com
- Vacuum Leak - DodgeForum.com