Dodge Ram: How to Replace Dome Light
If you notice the light in your dome light area is dull, or otherwise non-operational, or better yet, you’re looking to upgrade to a brighter, more energy efficient LED bulb instead, the good news is this is a chore that can be completed by following these simple instructions.
This article applies to the Dodge Ram (1994-present).
Replacing a dome light is one of those things that often takes more time getting around to than actually doing. Responsible for providing the cabin of your Dodge Ram with illumination as you get in and out of the vehicle, a burned out bulb can be easy to forget if you do most of your driving during the day. However, it's an inconvenience to have at night when you need to look for something that’s fallen to the floor, or can’t find some loose change to pay for the toll. Replacing the bulb itself takes less than 60 seconds of your time and can be done for less than ten bucks. Here’s how.

Materials Needed
- Flat head screwdriver (or butter knife)
- Replacement bulbs
Step 1 – Pry off dome lamp cover
This can be done with something as simple as a flat head screwdriver. If you do not have one handy, you can also use a butter knife. Take care to not rush this part, as you do not want to crack or scratch the cover.

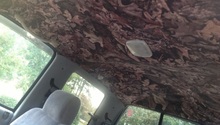
Step 2 – Remove old light
These lights pop out fairly easily, so just give it some wiggle in order to get it to come free. Do make sure you give it some time to cool down before you touch it.

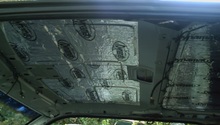
Step 3 – Replace with new light
The new light goes in just as easily as it comes out. Take care to not force it in though, as any sort of extra pressure can cause the bulb to crack. Snap cover back into place.
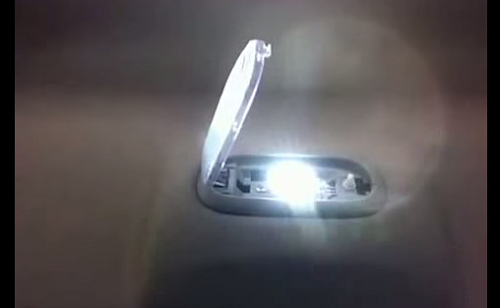
Figure 3. Replace the new bulb. 
Figure 4. Light replaced.
Featured Video: One Minute Dome Light Replacement
Related Discussions and Video
- Leaking Roof Dome Light Removal - Dodgeforum.com
- Replacing Overhead Map Lights - Dodgeforum.com
- Interior Dome Lights - Dodgeforum.com
- How to Install LED Dome Lights Ram - Youtube.com