Dodge Ram: How to Color Match Your Grille
Preparation and attention to detail are key ingredients to a successful paint project. If you take your time and be careful, your Dodge Ram's grille will look as good as the professionals.
This article applies to the Dodge Ram (1994-Present).
If you have cracks or the foil is bubbling on the sides or front of your grille, it may be time for a replacement. You can try to strip the foil off the grille but you'll probably end up with half of it still on. In this case, you'll need to re-paint your grille or buy a new one and color-match it to your RAM.

Materials Needed
- Socket set
- New grille (if needed)
- Masking materials (tape, paper)
- Tack cloth
- Adhesion promoter
- Primer
- Spray paint
- Mop, bucket and water
- Sandpaper
- Screwdriver or knife
- Superglue
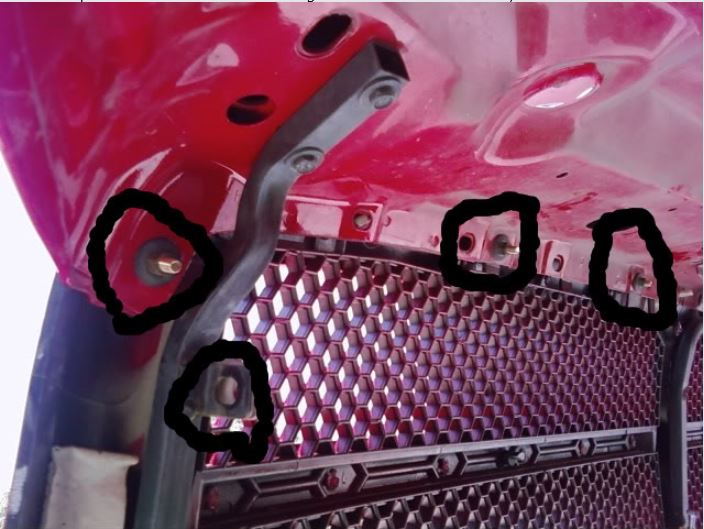
Step 1 – Remove grille
Use your ratchet and a 11/16-inch socket to remove the fasteners along the top of the grille. Work from underneath. Next remove four fasteners on each of the corners. Lastly, remove a clip and one more fastener in the middle, under the latch.
Step 2 – Retain emblem
If you are re-using your old grille, you need to remove the emblem to avoid painting it, You will also want to re-use the emblem from the old grille if you ordered a new grille because they don't come with emblems.
Use a knife or screwdriver and gently press the edges of the emblem until it pops out.
Pro Tip
You only need to apply a small amount of pressure to remove the emblem. It comes out fairly easily.
Step 3 – Prepare surface
Preparation is the key element for a successful paint job and color match. Use sandpaper to prepare the surface so the paint has something to "grip" onto. If you are re-using your old grille, buff the chrome surface with 300 or 600 grit coarse sandpaper. New grilles usually come with a glossy-black primed surface, sand down the glossy finish with 1000 grit fine sandpaper.
Pro Tip
If you are working in a garage, use the mop and bucket to wipe down the floors with water before you start to paint and occasionally while you are painting. This helps to keep down the dust and dirt.
Step 4 – Apply masking
You will need to mask off the inserts whether you are re-using your old grille or if you purchased a new grille (you cannot remove the inserts on most new grilles). If you are painting the inserts the same color as the rest of the grille, you do not need to mask them. Use tape and paper to mask the inserts as needed.
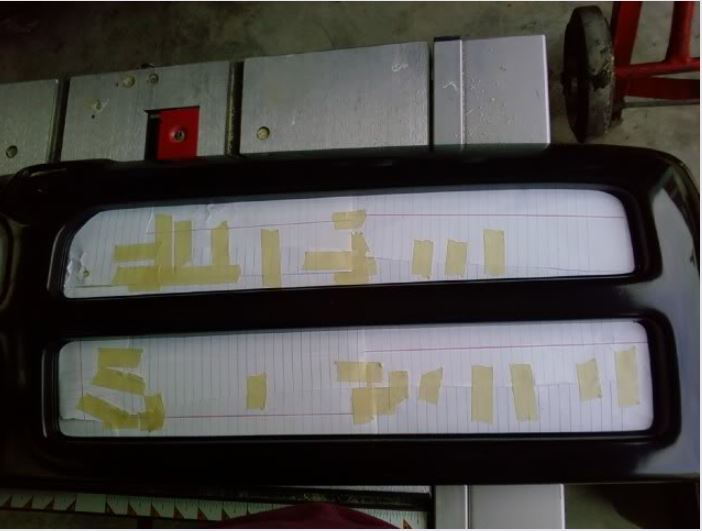
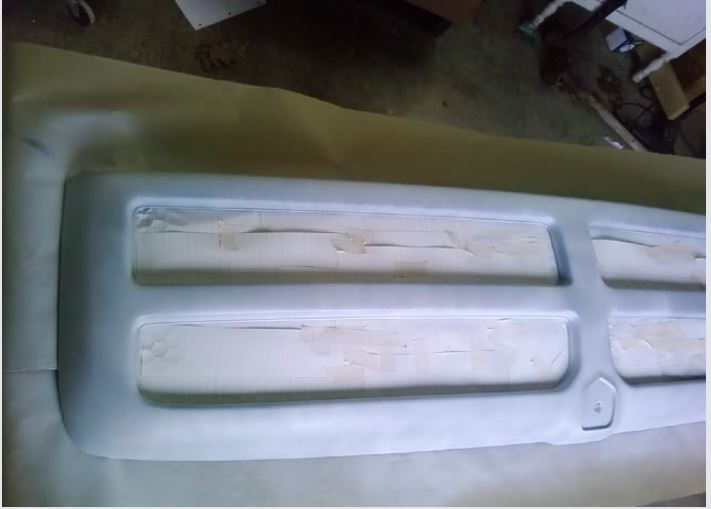
Figure 3. New grille before sanding (glossy finish); also shows inserts masked off. 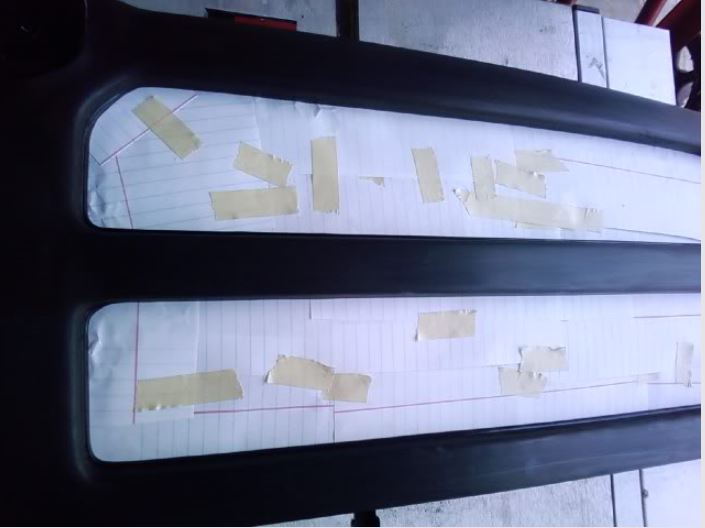
Figure 4. New grille after sanding (also shows inserts masked off).
Pro Tip
Any type of thin paper works well for masking but you can also purchase special masking paper from your auto paint store.
Step 5 - Tack cloth preparation
Use a tack cloth to wipe down all the surfaces you intend to spray. This special cloth picks up the sanding residue and dust particles that can mar your paint job.
Pro Tip
A tack cloth has a glue-like substance in the fibers that allows you to clean off the surface thoroughly.
Step 6 – Apply adhesion promoter
Using adhesion promoter is recommended because it helps the primer and the paint grip the surface better. Mix the can thoroughly. In a well-ventilated area. Spray the adhesion promoter evenly at a distance of about a foot. Allow the adhesion promoter to dry five minutes between coats.
Pro Tip
Your auto paint store should stock adhesion promoter along with primer and spray paint.
Step 7 – Apply primer
Wait fifteen minutes after you apply the adhesion promoter to begin priming. Even spraying is the key to good layers of coverage. Do not attempt to cover all the surfaces in one coat. Shake the can well and apply at least three coats of primer. Allow five minutes dry time between coats.
Pro Tip
To help with wear issues, choose a white primer if the finish coat is going to be a lighter color like white, red or yellow. Choose a black primer if the finish coat is darker, like black, purple, or dark blue.
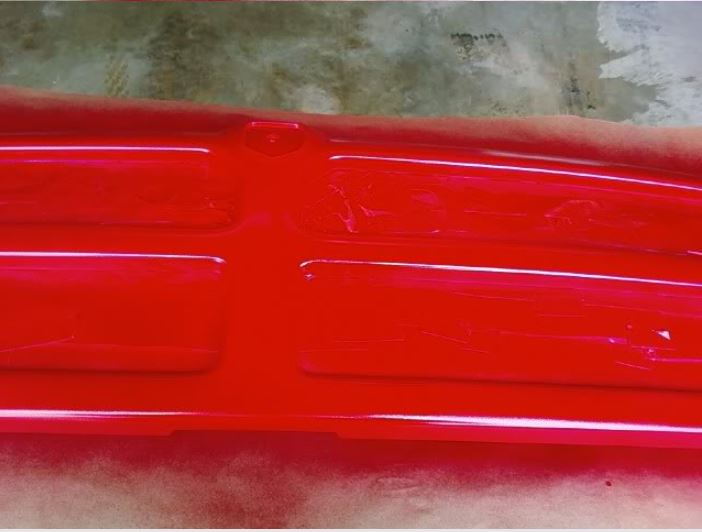
Step 8 – Apply finish coats
After you've applied primer, it's time for the finish coats. Shake the can for at least three minutes to make sure the paint mixes thoroughly. Hold the can about 12 inches from the grille surface. Spray evenly and, like the primer, do not attempt to cover everything in one coat. This prevents blotching and you will cover the entire grille with subsequent coats anyway. Allow five minutes between coats and spray evenly in a smooth line. Apply at least five coats.
Occasionally tip the can upside down and spray some paint into the air until just air comes out to clear the nozzle. This allows the paint to spray evenly.
Allow your finish coats to dry overnight. The next day, check for imperfections. If you need to apply another coat, run over the surface with the tack cloth to remove any dust or dirt that may have landed on the grille overnight.
Pro Tip
Paint manufacturers are located all around the country and different batches of paint sometimes give you a slightly different hue. So buy all your paint from the same paint store.
Step 8 – Remove masking
Remove the masking after the final coat (but before letting the grille "cure" overnight). Removing the masking at this time helps prevent the masking from sticking to the painted grille.
Step 9 – Re-attach emblem
After the final coats of paint, it's time to re-attach the RAM emblem. Use super glue and apply enough on the rear side of the emblem so it sticks.
Step 10 - Re-install the grille
Reinstalling the grille is the reverse of the install. Be careful not to over-tighten the fasteners since they are plastic and could break if you tighten them too much.
Pro tip:
Do not wash your RAM for 30 days to allow the paint to dry thoroughly. Even though the painted grille may look and feel dry, it takes this long for all coats to dry fully. For the same reason, also wait 30 days to re-attach your bug shield, if you have one.
Related Discussion
- DIY Color Matching Your Grille - Dodgeforum.com