Dodge Ram 2009-Present: How to Install a Fifth Wheel
If you're driving along at 60 mph towing something that weighs four tons or more, you probably want to be sure that whatever is hitched to your truck is securely fastened. Fifth wheel trailer hitches offer the room and capacities unavailable in those smaller hitches. This article will show you how to securely install a fifth wheel trailer hitch in the bed of your 4th generation Dodge Ram.
This article applies to the 4th generation Dodge Ram (2009-Present).
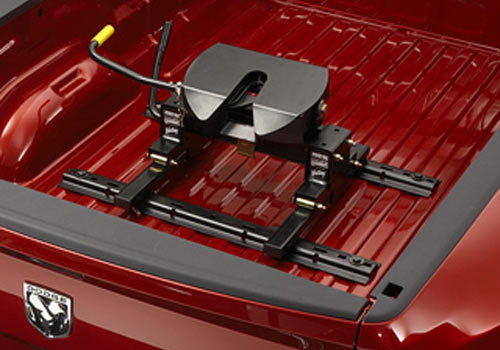
Essentially, a fifth wheel hitch helps with the weight and drag of a fifth wheel trailer by using the frame of your truck to disperse the inertia of pulling and stopping larger trailers. This hitch is bolted through the bed of your truck and is attached directly onto the truck's frame.
This article will show how to install a Curt Custom Fifth Wheel Installation Kit for Dodge Ram (part # C16420-104) with a Reese 15K Fifth Wheel Hitch with Kwik-Slide. The installation process may vary by manufacturer.
There are a number of manufacturers that produce fifth wheel trailer hitches. Each uses their own installation hardware with differing sized nuts and bolts. This means that the rails and mounting brackets from each manufacturer may be different from one another in size and shape, and the installation instructions may vary. This article will give you general guidelines on how to do the installation yourself.
There are four items you need to get for a complete fifth wheel installation :
- The fifth wheel hitch (sometimes called the "head").
- The rails that the hitch sits on.
- The mounting brackets that bolt onto the frame of the truck.
- The installation hardware.

Materials Needed
- Power drill with 1/8", 3/16'', 9/16", 17/32", and 1" drill bits (depends on brand)
- Torque wrench (100 ft-lbs)
- Ratchet, extension, and socket set
- Hammer and pilot/center punch
- Zip ties
- Tape measure and marker
- Prying tool or flat head screwdriver
- 7/8" hole saw bit
- 1/4" pilot bit
- Lubricant spray and tube brush (or old toothbrush)
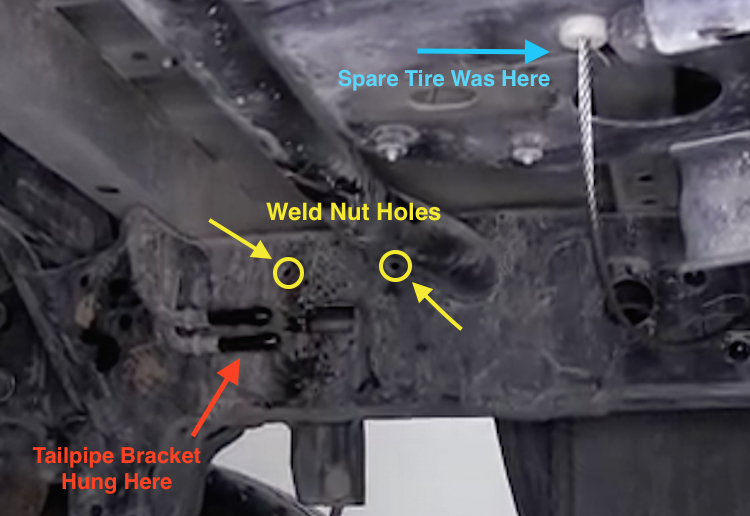
Step 1 – Prep undercarriage
- Jack up your truck and remove the stowed spare tire.
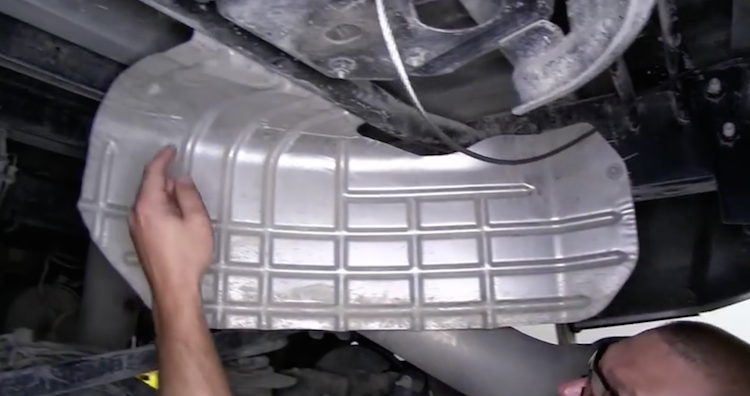
- Then unbolt and remove the heat shield.
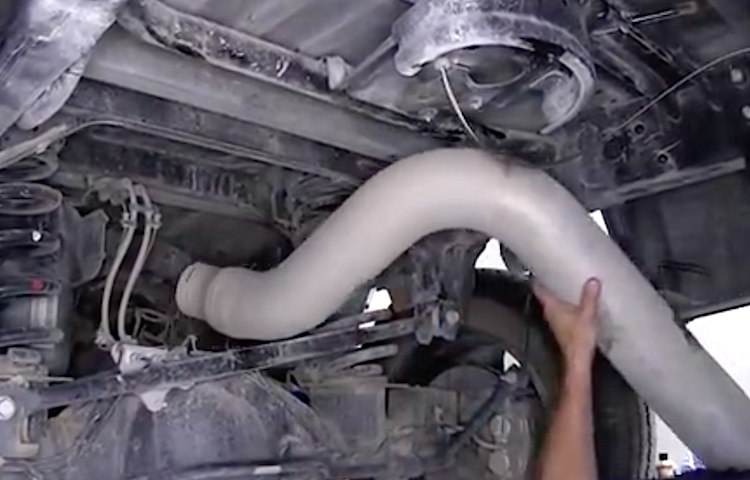
- Remove the rear section of the tailpipe by loosening the clamp securing its connection on the front end.
- Lift the pipe off of its dampening hanger and set it aside.
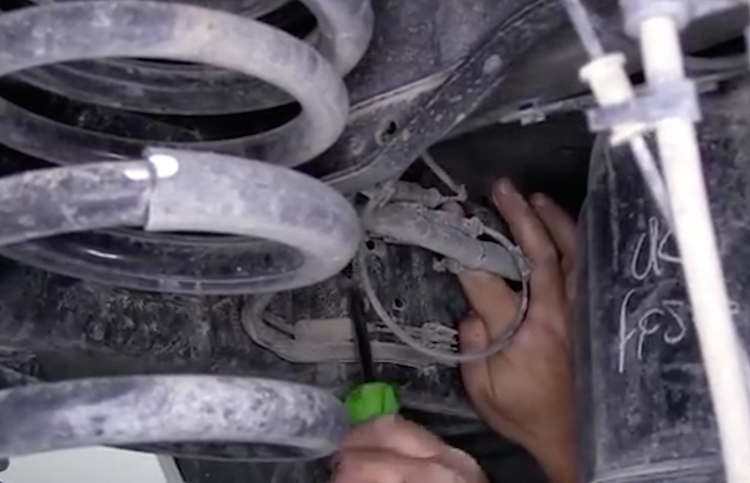
- Carefully pry the vacuum and electrical lines away from the driver's side frame. This gives you access to where the driver side brackets will be mounted.
(Related Article: How to Jack Up Your Truck - DodgeForum.com)
Step 2 – Install the front frame brackets
We are demonstrating the installation of a Curt Custom Fifth Wheel Hitch because it utilizes the pre-existing weld holes in the frame. For other brands you will have to use C-clamps or drill holes in the frame to attach the brackets.
- Locate the pre-existing pairs of weld nuts where the brackets will be bolted onto. There are two sets on each side of the truck.
- Spray lubricant to clean out the weld nuts. A tube brush or old toothbrush will allow you to make sure the lubricant has entirely covered the bolts threads.
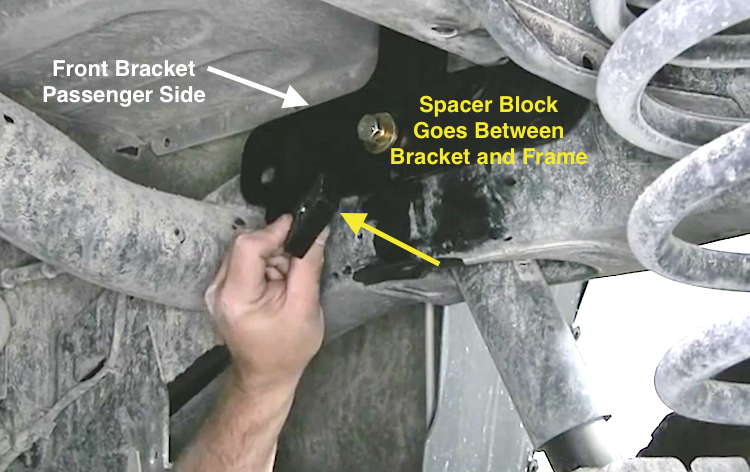
- Using the appropriate sized hardware (12x36 mm and 12x45 mm Hex bolts; 1/2" conical toothed washers), bolt the brackets for the front rail (the one closest to the cab) to the frame; do not fully tighten the bolt.
- After you install the passenger's side front bracket, repeat the process on the driver's side. You will be using a spacer bar on each one.
Notes
- Do not install a fifth wheel hitch on top of a plastic bed liner because the hitch may come loose. There isn't a problem if the bed has been spray coated with a liner.
- Only use the hardware supplied with your fifth wheel kit. It has been engineered by the manufacturer to hold tightly and not snap.
Step 3 – Install front rail
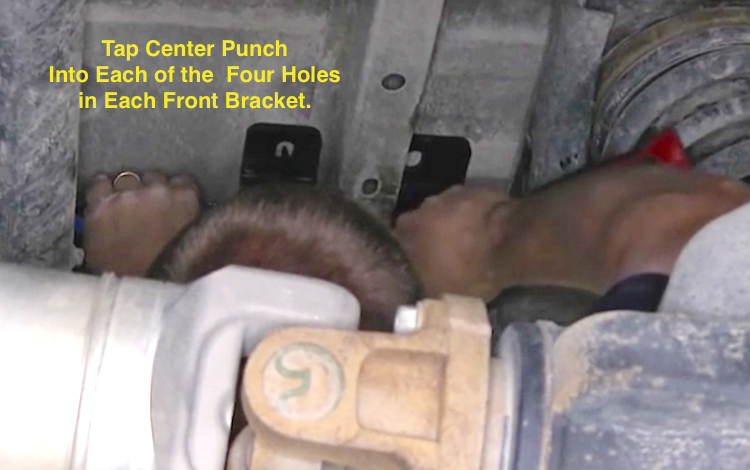
- Using a punch tool and hammer, mark the locations for the four rail bolts. Do so by tapping through each hole of both front brackets.
- Move onto the bed of the truck and locate the punch marks. There will be four on each side of the bed.
- Position the front rail so that each end lines up with the punch marks.
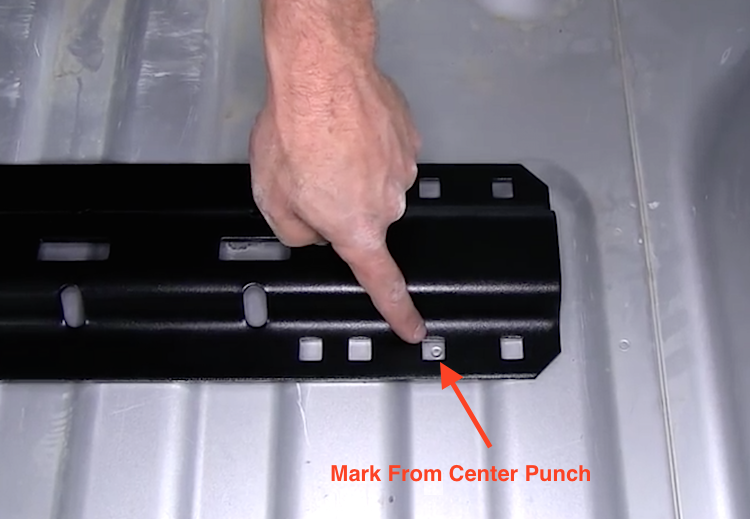
- Once you have the front rail centered on the marks, drill a small hole through the each of the two punch marks using a power drill and 1/8" drill bit.
- Make your way back under the truck and make sure the holes are aligned with the holes on the mounting brackets.
- If the holes are correctly aligned, drill the remaining two holes on the bed through the bottom part of the front rail.
- Again, make your way back under the truck and make sure the last two holes are aligned.
- If all four holes line up, make your way to the truck bed and move the rail away.
- Use a 9/16" bit to drill out the four holes.
- Place spacers around the drilled holes. These prevent the rail from crushing the corrugated parts of the truck bed.
- Place the front rail over the spacers and holes. Then drop in the four 1/2" carriage bolts.
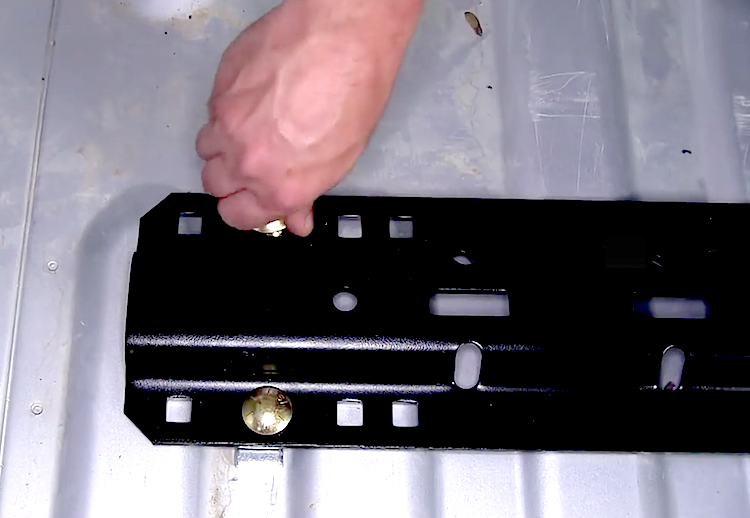
- Make your way under truck and slide spacers over the threaded end of the protruding carriage bolt.
- Hand-tighten a 1/2" flange nut onto both carriage bolts.
- Repeat this for the two carriage bolts on the other side.
Step 4 – Install rear rail
- Place the fifth wheel head support legs into the front rail.
- Then slide the rear rail into position under the other set of support legs. This gives you an accurate placement for the rear rail.
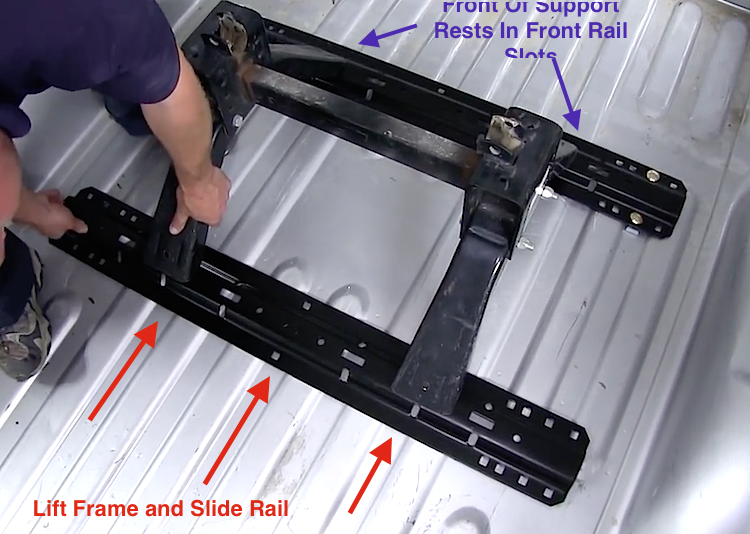
- Make sure the head support fits solidly into the rail, and measure to check that the rail is equidistant from both sides of the bed.
- Once again, use a 1/8" bit to drill pilot holes for the rear rail bolts. The holes will be drilled in the last spot from the outside of each rail.
- For the two holes closest to the tailgate, use a 1/4" bit to drill pilot holes through the bed and bed rail.
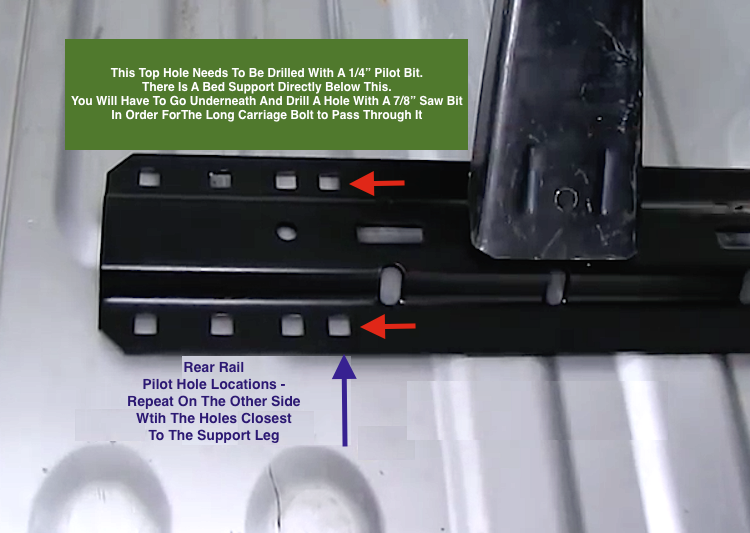
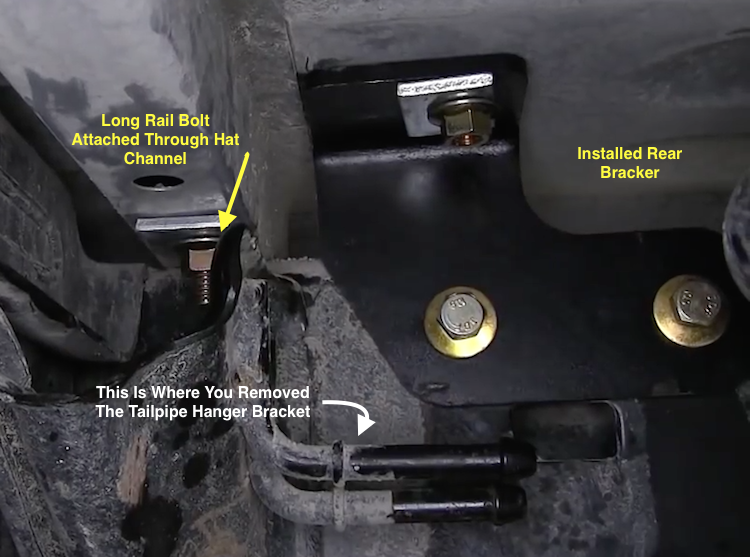
- Because the lower rear rail hole goes into the (hollow) bed support rail, you will have to insert an extension.
- Locate the 1/4" pilot hole you drilled underneath the truck. Using a 7/8" saw bit, cut a hole on the underside of the bed support.
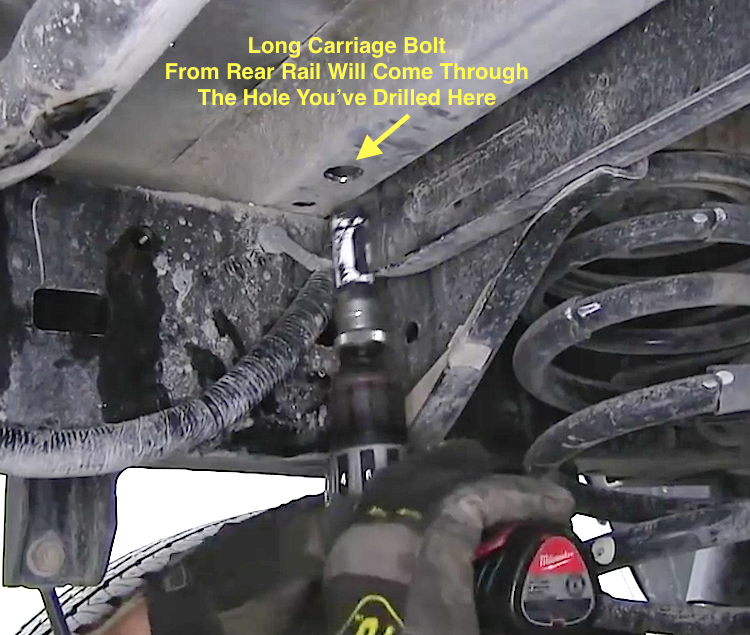
- Reach around to the open end of the bed support (also called a hat channel), and insert the round spacer tube.
- Place the tube upright over the 7/8" hole you drilled in the support.
- Attach the rear rail brackets using the weld nuts in the frame. Be sure to use the square spacers before you screw on the flange nuts.
- Then attach the other side of the rear rail bracket.
- Place real rail over drilled holes in bed. Be sure to place spacers around the holes before you insert the bolts.
- After the bolts are dropped in, move under the truck and attach them to frame brackets.
- Once both rails have been hand-tightened, you will install two more bolts.
- Insert one bolt in the middle hole of the front rail nearest to the cab.
- Insert the other in the middle hole nearest to the rear rail.
- Use a 1/2" drill bit to make the hole.
- Slide two U-shaped spacers around the holes, and drop in the 1/2" carriage bolts.
- Under the truck, slide the spacer blocks and 1/2" flange nuts on both bolts.
Step 5 – Complete installation
- Starting with the rail bolts and then to the frame bracket bolts, tighten all nuts using a torque wrench. Tighten each bolt to the manufacturer's specs.
- Re-attach the electrical and vacuum lines you pulled away. If you can't get all the fasteners back into the frame, you can use zip ties to attach them.
- Re-install the tailpipe.
- Re-install the spare tire heat shield, and winch the spare tire back into place.
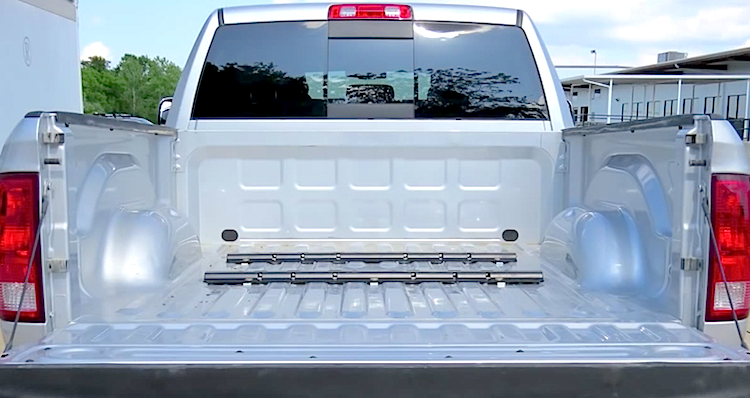
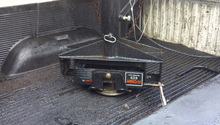
Figure 17. Fifth wheel hitch rails installed. 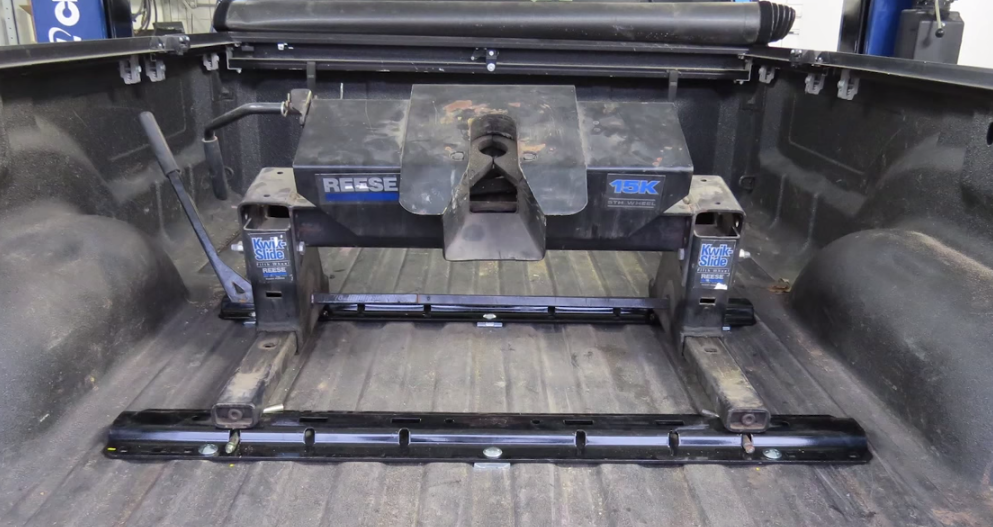
Figure 18. Reese fifth wheel hitch installed.
Related Discussions and Video
- Installation of a Fifth Wheel on a 2011 Dodge Ram- YouTube.com
- 2014 5th Wheel / GN Towing Prep Group - DodgeForum.com
- Ram Fifth Wheel Hitch - DodgeForum.com
- Anybody Tow a Fifth Wheel? - DodgeForum.com