Dodge Ram 2002-2008: How to Replace Starter
The starter creates the initial rotation of the engine to start the combustion process. It uses electrical power supplied from the battery and converts it into mechanical motion. Starters have many moving parts that must have proper electrical conductivity, otherwise your engine may not crank.
This article applies to the Dodge Ram 3rd Generation (2002-2008).
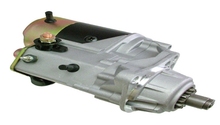
The starter motor contains the electric motor, the drive mechanism, and the solenoid. On the Dodge Ram 1500, it can be found connected to the driver's side of the transmission. Once the ignition switch is turned to the start position, the starter solenoid energizes and the plunger moves the starter drive pinion gear into mesh with the flex plate ring gear making the crankshaft rotate.
Starters can fail for a number of reasons, including damage to the drive pinion gear, damage to the electrical windings inside of the solenoid, and large gaps between the commutator and brushes. Grinding noises while cranking and little or no engine movement while cranking are symptoms of a faulty starter. Always verify your battery is fully charged and operational before deeming the starter as the problem. High resistance or an open/short in a cable leading to starter from the battery can cause similar symptoms as well.

Materials Needed
- Starter
- Flat head screwdriver
- 10mm wrench
- 3/8" and/or 1/2" ratchets
- 4" to 6" extension
- 13mm and 14mm sockets
This how-to was written based off of the 5.7 liter Hemi engine.
Step 1 – Disconnect the battery
Use a 10mm wrench to remove the negative (black) cable from the battery. Place the cable in an area where it will not accidentally contact the battery, or wrap the cable in electrical tape.
Step 2 – Remove the electrical wiring from the starter
Crawl under the driver's side of the truck. Near the driver's side tire you will see the starter between the engine and transmission above the exhaust.
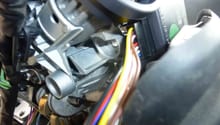
Two wires are attached to the starter. The smaller wire runs from the ignition switch to the starter, and it is held in place by a plastic clip. This clip slides onto a metal tab on the starter. Squeeze the larger portion of the plastic clip (you will feel the clip compress), and slide the clip off the metal tab.
Once you have enough room, remove the nut holding the wire terminal coming from the battery. You will need a 13mm socket or wrench. If enough space is not available, wait until the starter has been disconnected from the transmission, but do not let the starter hang from the wire.
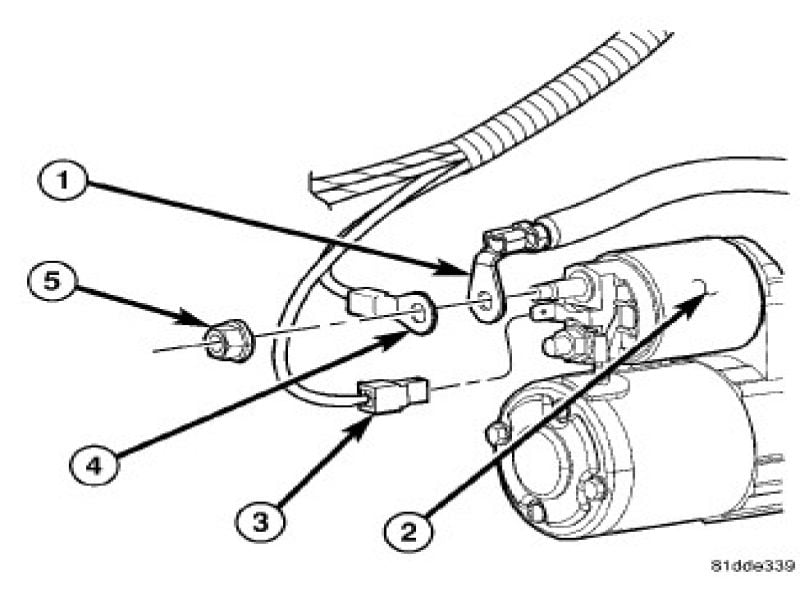
Breakdown of the diagram (Figure 1):
- Number 3: The small wire with the plastic clip
- Number 4: Larger wire terminal from the battery
- Number 5: Nut holding the terminal to the starter
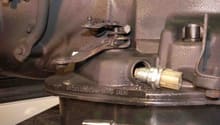
Step 3 – Remove the starter from the transmission
Two bolts with 14mm heads hold the starter to the transmission. The first bolt will require the use of an extension (about 4-6 inches). The second bolt is closer to the tire, but it's harder to see. It is surrounded by a black plate/bracket that is attached to the transmission. You will also see a cable held by a plastic push pin that is connected to the bracket.
Once the bolts are removed, the starter will slide out of the slot in the transmission. Now inspect the starter gear. If damage is present on the gear, you will need to inspect the flex plate ring gear for damage. This can be done by rotating the engine clockwise by hand using the harmonic balancer bolt to view the entire ring gear.

Figure 2. A drawn location of both starter bolts in relation to the transmission and the bracket. 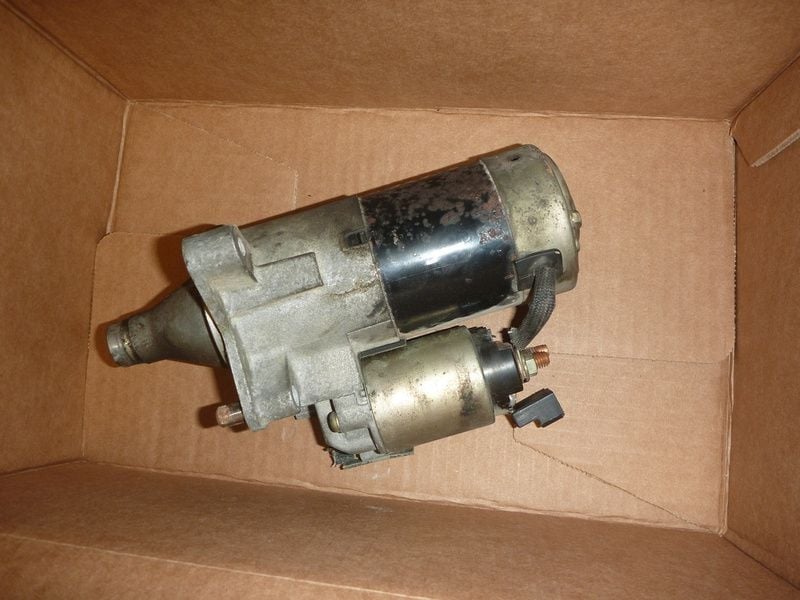
Figure 3. The starter has been removed from the vehicle.
Step 4 – Install the new starter
Guide the starter into the transmission slot. Start the two 14mm headed bolts by hand, and then torque the bolts around 30 ft./lb. Re-connect the electrical wiring, and then re-install the negative battery cable.
Featured Video: Dodge 1500 Starter Change
Related Discussions
- No Power to Starter - DodgeForum.com
- Starter Issues - DodgeForum.com
- Starter or Alternator Problem - DodgeForum.com
- Wont Start, New Starter - DodgeForum.com