Dodge Ram 2002-2008: How to Replace Power Window Motor
Has your power window stopped working? Fortunately, all you have to do is replace it; use the following instructions to do so.
This article applies to the Dodge Ram (2002-2008).
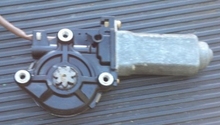
The window motor on your Dodge Ram is part of a bigger component called a regulator. A regulator is comprised of two rails that push the window up, or pull it down, by use of the window motor. To replace the motor, the entire window regulator must be replaced as well. Due to how large this component is, labor tends to cost more than double the price of the part. In an effort to save you money, we have listed the following instructions so you can easily replace the window regulator in a Dodge Ram.

Materials Needed
- T40 Torx driver
- Phillips screwdriver
- 10mm socket and ratchet w/ extension
Step 1 – Remove the door panel
- The door panel has a T40 Torx screw behind its handle; first remove this and then loosen the four Phillips screws.

- Pry the control panel off of the door and disconnect the two wire plugs.

Figure 2. Disconnect the control panel plugs. 
Figure 3. Remove the door panel.
Step 2 – Remove the handle assembly
- Loosen the two 10mm bolt on the handle assembly.
- Remove the door lock rod from the handle assembly.
- Remove the handle assembly and pull back the weather stripping.

Figure 4. Loosen the 10mm bolts on the handle assembly. 
Figure 5. Pull back the weather stripping.
Step 3 – Remove the regulator
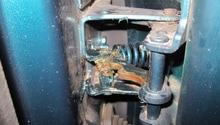
The first two bolts you have to focus on are those holding the window in place. Play with the controls until you align the window bracket bolts behind the access ports. Loosen the two 10mm bolts and pull the window up by hand. Use several straps of painter's tape to hold the window in place, while the regulator is replaced (refer to Figure 7).

Figure 6. Align the window and remove the 10mm bracket bolt. 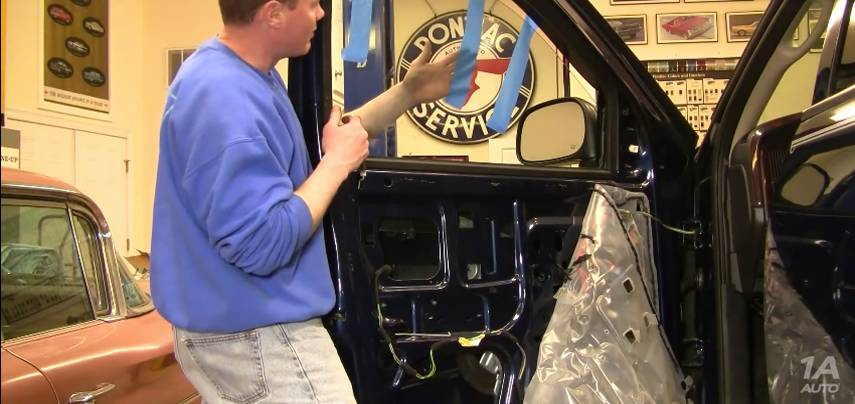
Figure 7. Tape the window in place.
- Proceed to remove the rest of the 10mm bolts that secure the regulator in place.
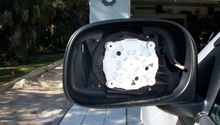
- Then pull the regulator out of the access port in the door.

Step 4 – Install the new regulator
- Slide the new regulator into place.
- Align the regulator with the bolt holes on the door and secure it in place.
- Align the window holder up in place.

Figure 9. Slide the new regulator into the door. 
Figure 10. Align the regulator with the bolt holes on the door.
- Carefully mount the window into the new regulator.

Step 5 – Re-install the door handle assembly and panel
- Lay out the water guard.
- Mount and install the door handle bracket assembly.
- Slide the door lock pin into the handle assembly.
- Mount the panel.
- Reconnect the control panel, and mount it into place.
- Tighten the Phillips screws and T40 Torx screw.