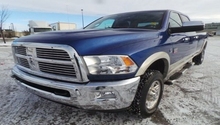
Dodge Ram 2002-2008: How to Replace Differential Fluid
Replacing the lubricant in your rear differential isn't difficult, but it does require following a number of steps carefully. Continue reading and we'll show you how it is done.
This article applies to the Dodge Ram (2002-2008).
Knowing your rear differential’s gear ratio can help you get an average reading of your Ram's fuel mileage, as well as determine the appropriate towing capacity. Another thing you should know is that the differential must be regularly maintained and serviced by replacing its fluid. But before we get to this actual job, there are a few more things we need to clear up.
Check which rear end differential you have to make sure you’re adding the right lubricant. Be aware that some trucks have add-on options that will dictate a different rear differential than what’s called out in the owner’s manual. For example, in 2005 there was a 3.21 non-limited-slip differential (LSD) axle ratio rear end for 2WD use and a 3.55 axle ratio rear end. Most 3.55 axle ratio rear ends were not limited slip, but if the truck was ordered with the trailer tow group, an LSD 3.55 version was included.

Materials Needed
- Oil drainage pan
- Socket wrench and metric socket set
- Torque wrench
- Flat head screwdriver
- Appropriate amount of the proper differential lubricant (for the 3.92 differential shown, 72 oz. [2.2 L] of SAE 75W-140 synthetic gear and axle lubricant, plus 4 oz. of limited slip additive)
- Hydraulic floor jack and jack stands (optional)
- Paint stick or tape
- Scraper
- Shop rags
- Non-metallic abrasive cleaning pad
- RTV
Step 1 – Find the differential gear ratio
To find your differential gear ratio and if it’s LSD or non-LSD (often called an "open" differential), check the glove box first to see if it has a tag that indicates the gear ratio number and whether it’s a LSD (DSA is Chrysler’s code for limited slip). There could also be a label on the axle indicating the gear ratio and if it’s limited slip. But if you can’t find either the tag or label, before purchasing any gear and axle lubricant and limited slip additive, you can quickly and easily determine the type and ratio of your differential. To do so, perform the following:
- Make sure your truck is on level ground.
- Turn the engine off and put your truck in neutral.
- Use a floor jack and jack stands to support the truck's rear end.
- Spin one of the rear tires.
- If the other rear tire turns in the same direction, your truck has a limited slip differential.
- If the other tire turns in the opposite direction, you don’t; your truck has an "open" differential.
With your truck's rear end on jack stands, it's also a simple matter to determine your rear differential gear ratio. To do so:
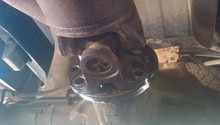
- Mark with a paint stick or tape the bottom surface of a rear tire and the bottom of the differential's pinion hub.
- If the differential is LSD, turn the tire once while counting the rotations of the pinion hub (a video camera or video-compatible smart phone trained on the pinion yoke can be a big help here). The number of pinion yoke turns is your gear ratio. Thus, if the pinion yoke rotates 3.92 turns for 1 complete revolution of the tire you have a 3.92 rear end ratio.
- If the differential is non-LSD ("open"), hold the non-marked tire to keep it from spinning as you turn the marked tire two full rotations, and while doing so, count the pinion yoke rotations—the “open” rear end tire is spun twice because of rotational loss due to this design’s “spider” gearing. (Another non-intuitive aspect of the "open" differential design: it sends rotational power to the rear tire that doesn't have traction, not the one that does.)
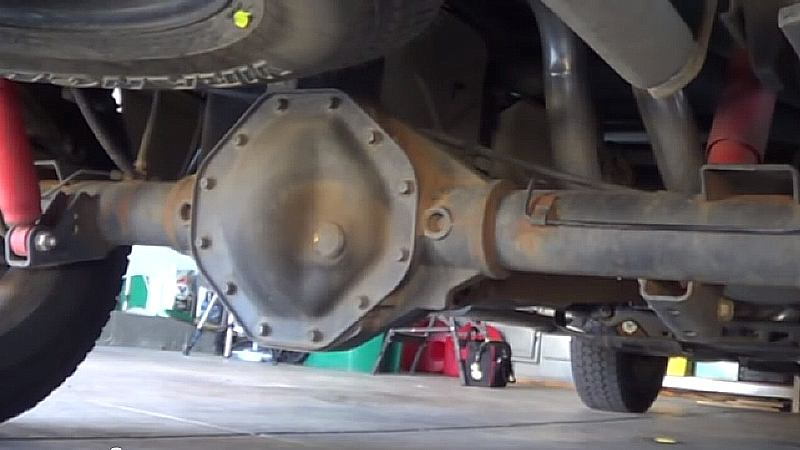
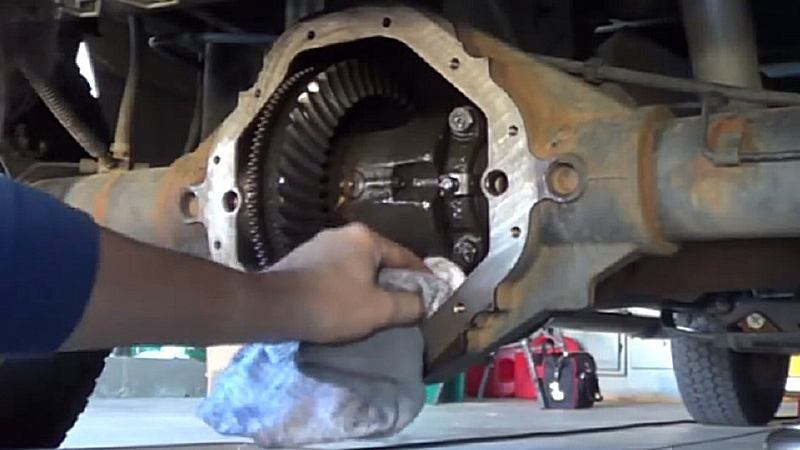
Step 2 – Remove differential cover and drain
Although some other pickup truck brands conveniently have both a drain plug and filler plug on their rear differential housing, Ram trucks of this vintage do not. They only have a single filler hole sealed with a rubber plug. For this reason, some truck owners change their differential fluid by pumping it out with a hand pump. However, many others prefer to clean the inside of the housing thoroughly, including the magnet that collects gear shavings before refilling the housing with fluid. This requires the complete removal of the cover.
- Again, make sure your truck is level when draining and refilling the differential fluid.
- Unscrew the differential's lower cover bolts, but only loosen the top two. Don’t remove the bolts completely.

- Using a screwdriver, pry the lower cover away from the housing seal just a bit, and let the fluid drain.
- Then remove the top bolts and take the cover off the housing.

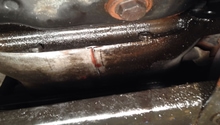
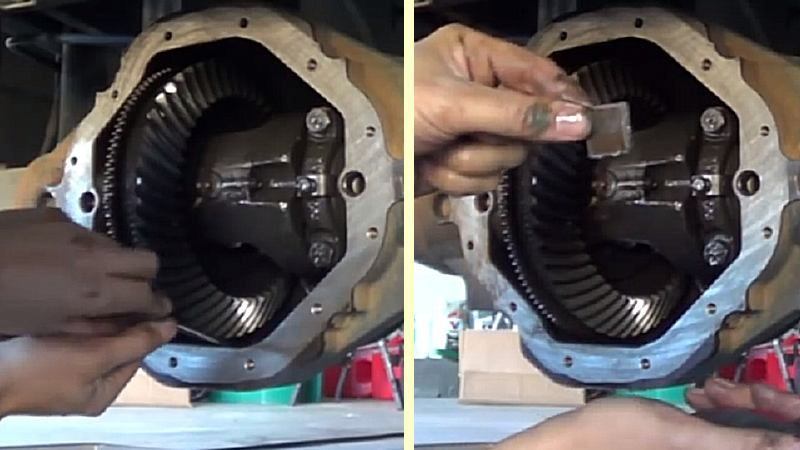
- Carefully clean any gasket pieces or room temperature vulcanization (RTV) silicone residue off the inside of the cover’s lip. Take care not to scratch the cover's sheet metal mount surface while doing this.
- Note that after cleaning the sealer residue off, this owner (as shown in Figure 5) also wire-brushed and repainted the exterior of the cover, taking care to remove the rubber filler stopper before applying the paint.
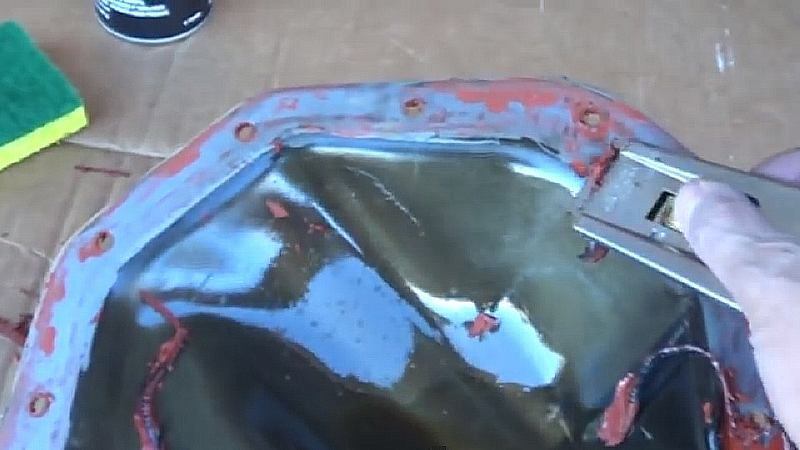
Figure 4. Remove sealer residue from the cover mount surface. 
Figure 5. Cleaned and painted differential cover.
Step 3 – Apply gasket seal to differential cover mounting surface
- As noted, this truck came with an RTV gasket instead of a pre-cut gasket. If you prefer pre-cut gaskets, check with your parts store to see if one is available for your differential. In Figure 6, the owner will replace the factory RTV seal with a new RTV gasket seal.
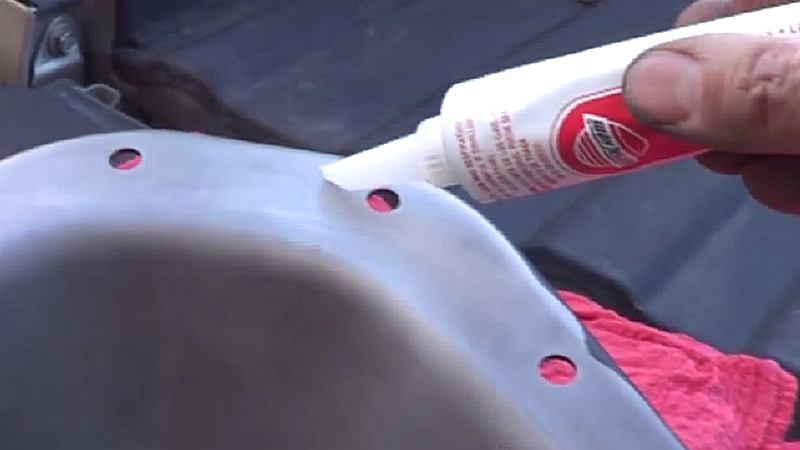
- RTV is a two-component formula that cures to the required hardness at room temperature after it’s applied. Check to see what the wait time for the RTV you use is, which is listed on the back of the tube. The cure time prior installation can be anywhere from ten minutes to an hour. The RTV will be totally cured 12 to 24 hours after installation.
- Note that RTV is applied around the inside lip of the cover in one continuous bead. Don’t start and stop the bead for the bolt holes.
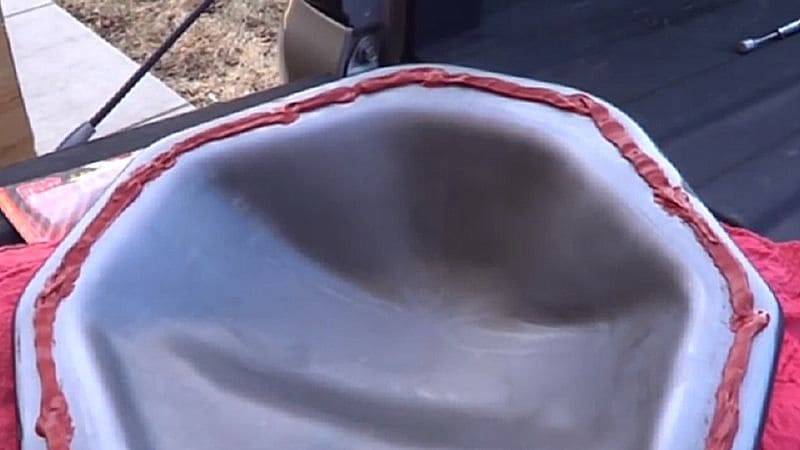
Step 4 – Cover exposed gears and clean mounting surface
- While the sealer cures, cover the exposed differential gears with a cloth or plastic sheet.
- Then clean and remove the old gasket material from the cover’s mounting surface on the differential housing. Again, taking care not to scratch its mount surface if a scraper is required.
- Use a non-metallic abrasive cleaning pad soaked in brake parts cleaner to remove any remaining residue.

Step 5 – Clean out the differential housing
- Use an old rag to wipe out any thickened lubricant that has collected at the bottom of the housing.
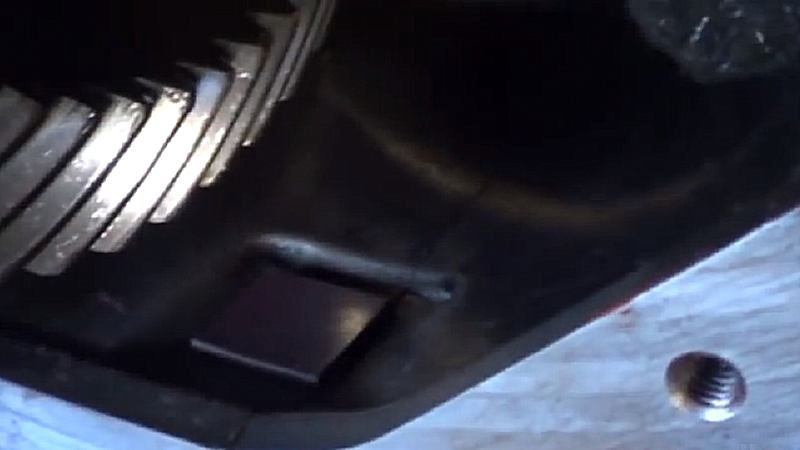
Step 6 – Remove, clean, and replace the magnet
- Using a screwdriver, gently pry up the flat, rectangular magnet on an inset steel plate mounted to the bottom of the housing. The magnet’s purpose is to collect and hold any steel particles (or “shavings”) that come off the gears during wear.
- Clean the magnet off with a rag, and replace it back to its attachment location.
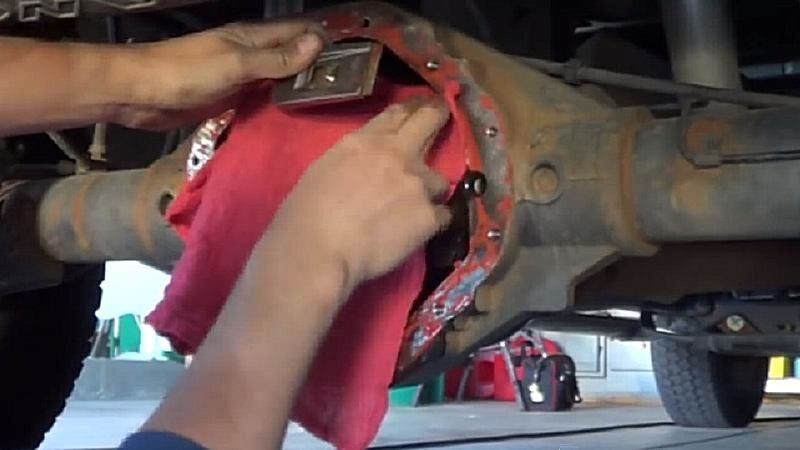
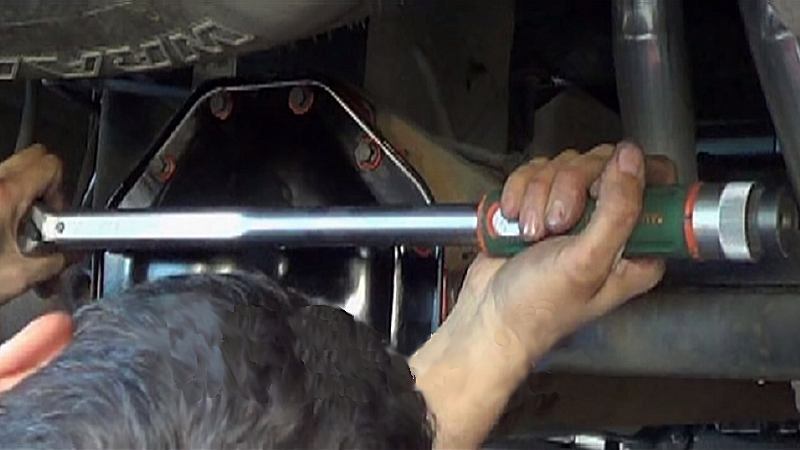
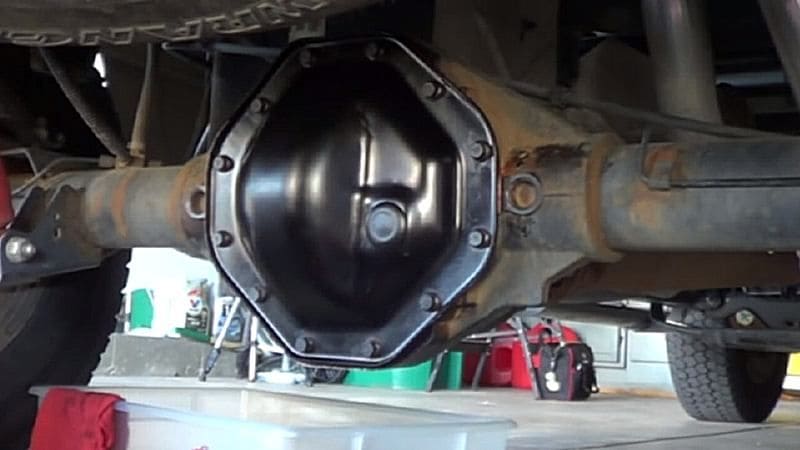
Step 7 – Replace the differential cover
- Position two bolts in opposite locations of the differential cover onto the housing, letting the RTV hold them in place.

- Finger-tight these two bolts and all the other bolts in place.
- Completely tighten them in a cross-wise pattern and torque them to 30 ft-lbs (40.5 Nm).
Step 8 – Refill the differential with fluid
- It’s time to refill the rear differential. First remove the rubber stopper.
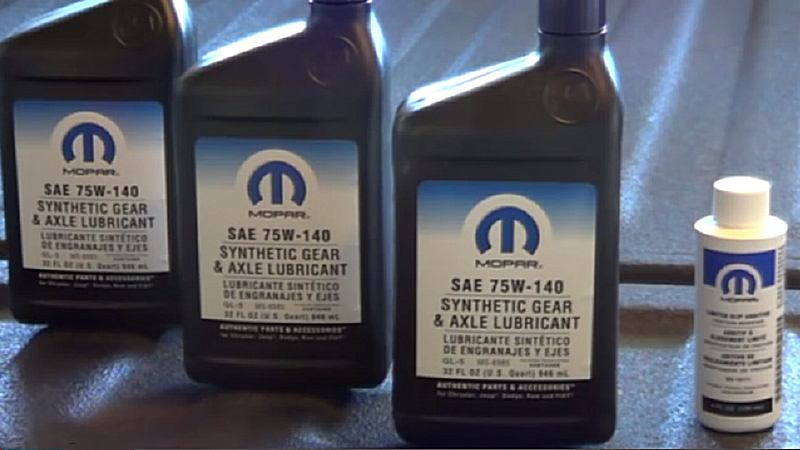
- If the differential is LSD, pour the 4 oz. of limited slip additive into the filler spout first.
- Then add the gear and axle lubricant.
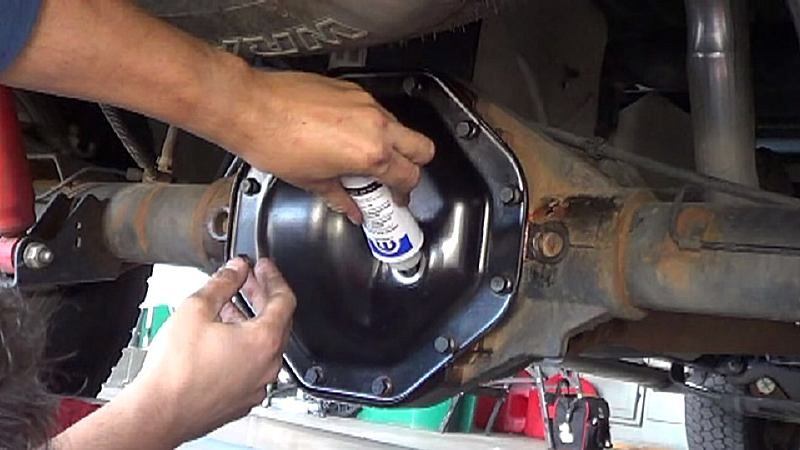
Figure 16. Pour limited slip additive into the differential. 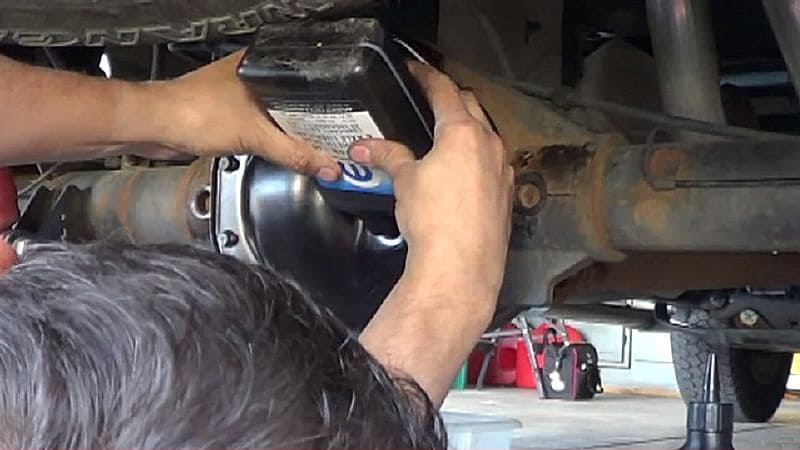
Figure 17. Pour gear and axle lubricant into the differential.
- When the fluid starts running out of the filler spout (about 72 oz in this case), stop.
- Then replace the rubber stopper.
You’re all done—except for the clean up.
Featured Video: Differential Fluid Change
Related Discussions
- DIY Rear Differential Fluid Change Cover Off - DodgeForum.com
- Differential Fluid Change - DodgeForum.com
- Limited Slip Differential Fluid - DodgeForum.com
- Differential Fluid Maintenance - DodgeForum.com